I love living in the city. I’ve probably mentioned this in the past, but I’m gonna reiterate it. It’s odd how I became a city girl, because I was actually a small-town kid at heart for the majority of my formative years. You see, I grew up in a small, central Illinois town: one of those towns where all you really had in terms of buildings were churches and bars. The towns were separated by corn fields and soybean fields, and everyone pretty much knew everyone else’s business.
The catalyst for me was when I spent a summer in Philly for an internship during my undergrad days. It was total culture shock for me: a small-town, naïve Midwestern girl, suddenly thrown into a row house, living in West Philly and dealing with internship life at a huge company, plus crazy East Coast traffic? It was pure insanity, and very uncomfortable at times. But it ultimately changed me for the better, and that, my friends, is why I now consider myself a city gal.
I’ve come to appreciate the city living because I adore the culture and history. I love the old brick buildings, the microbreweries, the eclectic, hipster-y mix of it all. I love that I can find Thai food, vegan comfort food, and Afghan food all on one street. The chaos and randomness of the people and places is fascinating to me.
But every now and then, there comes a time in which even the most seasoned, accidental city girl needs a break from all the bricks and culture. For times in which I just need a change of scenery, I’ll often take a solo road trip back to Illinois to visit friends and family.
This past weekend, I visited Belle, who is one of my best friends and mentors, an instructor I had during my undergrad days. Of course I always like to plan a baking project when I have my city breaks, so I asked Belle what she’d like for us to bake together.
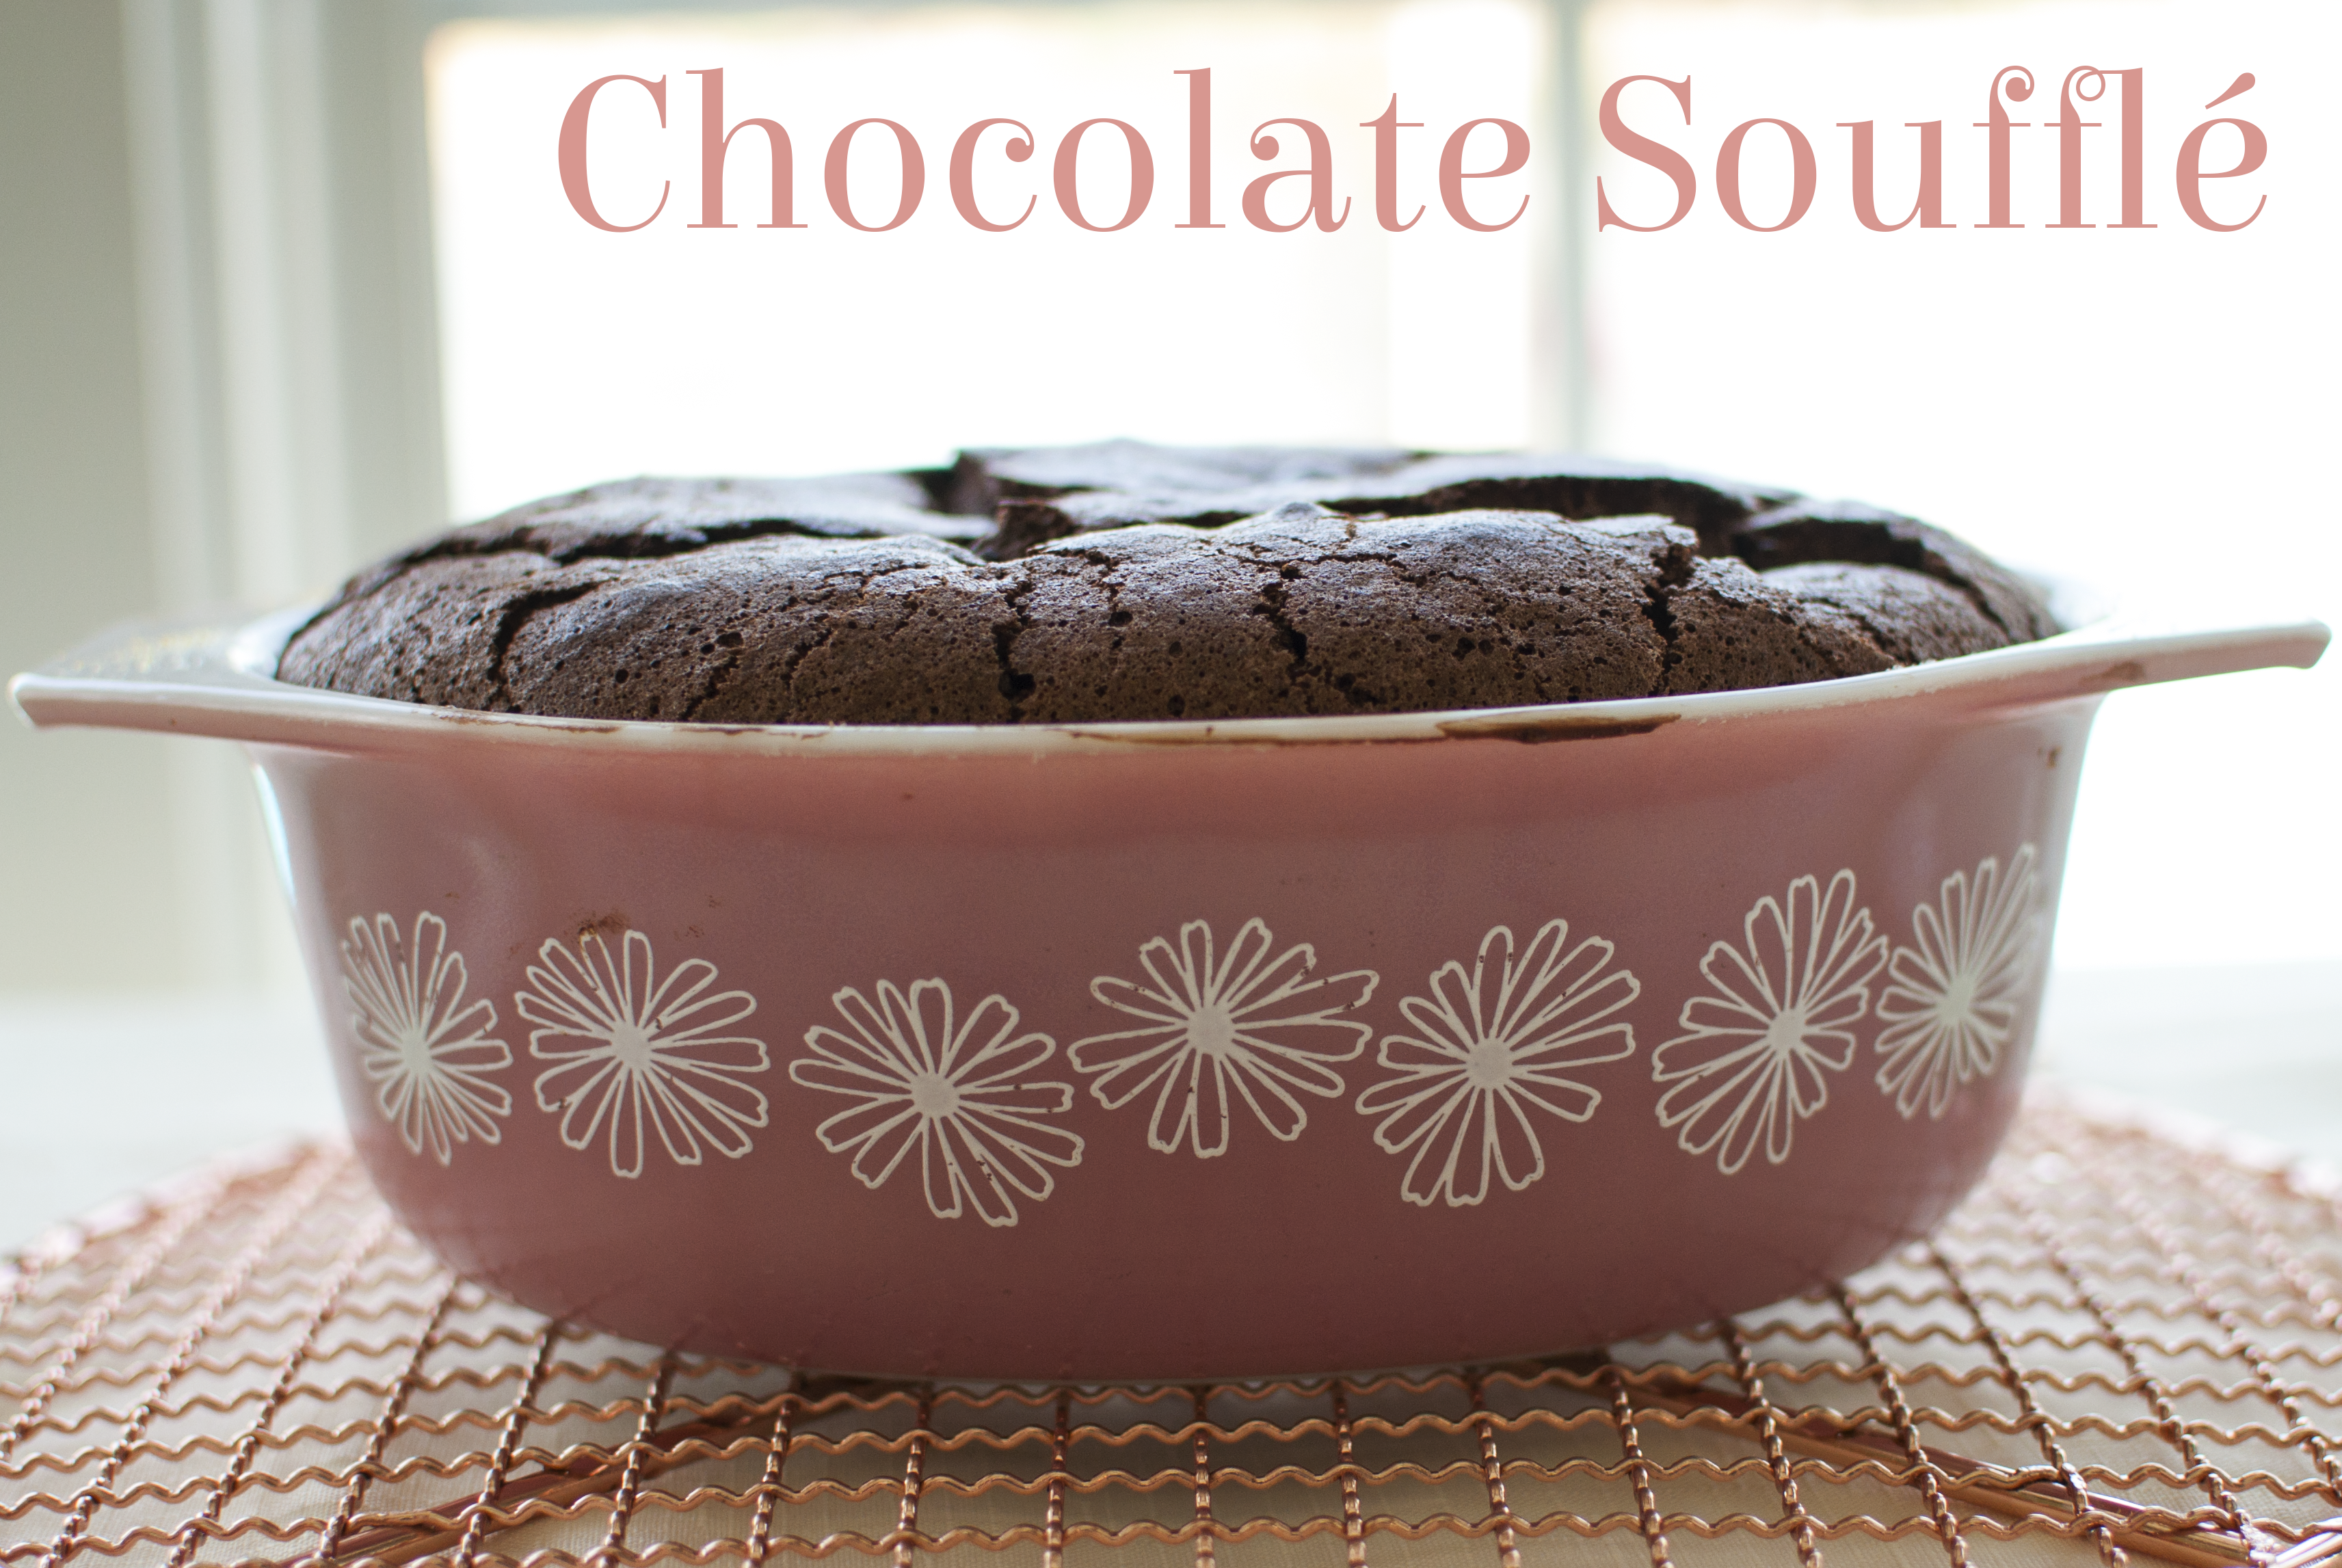
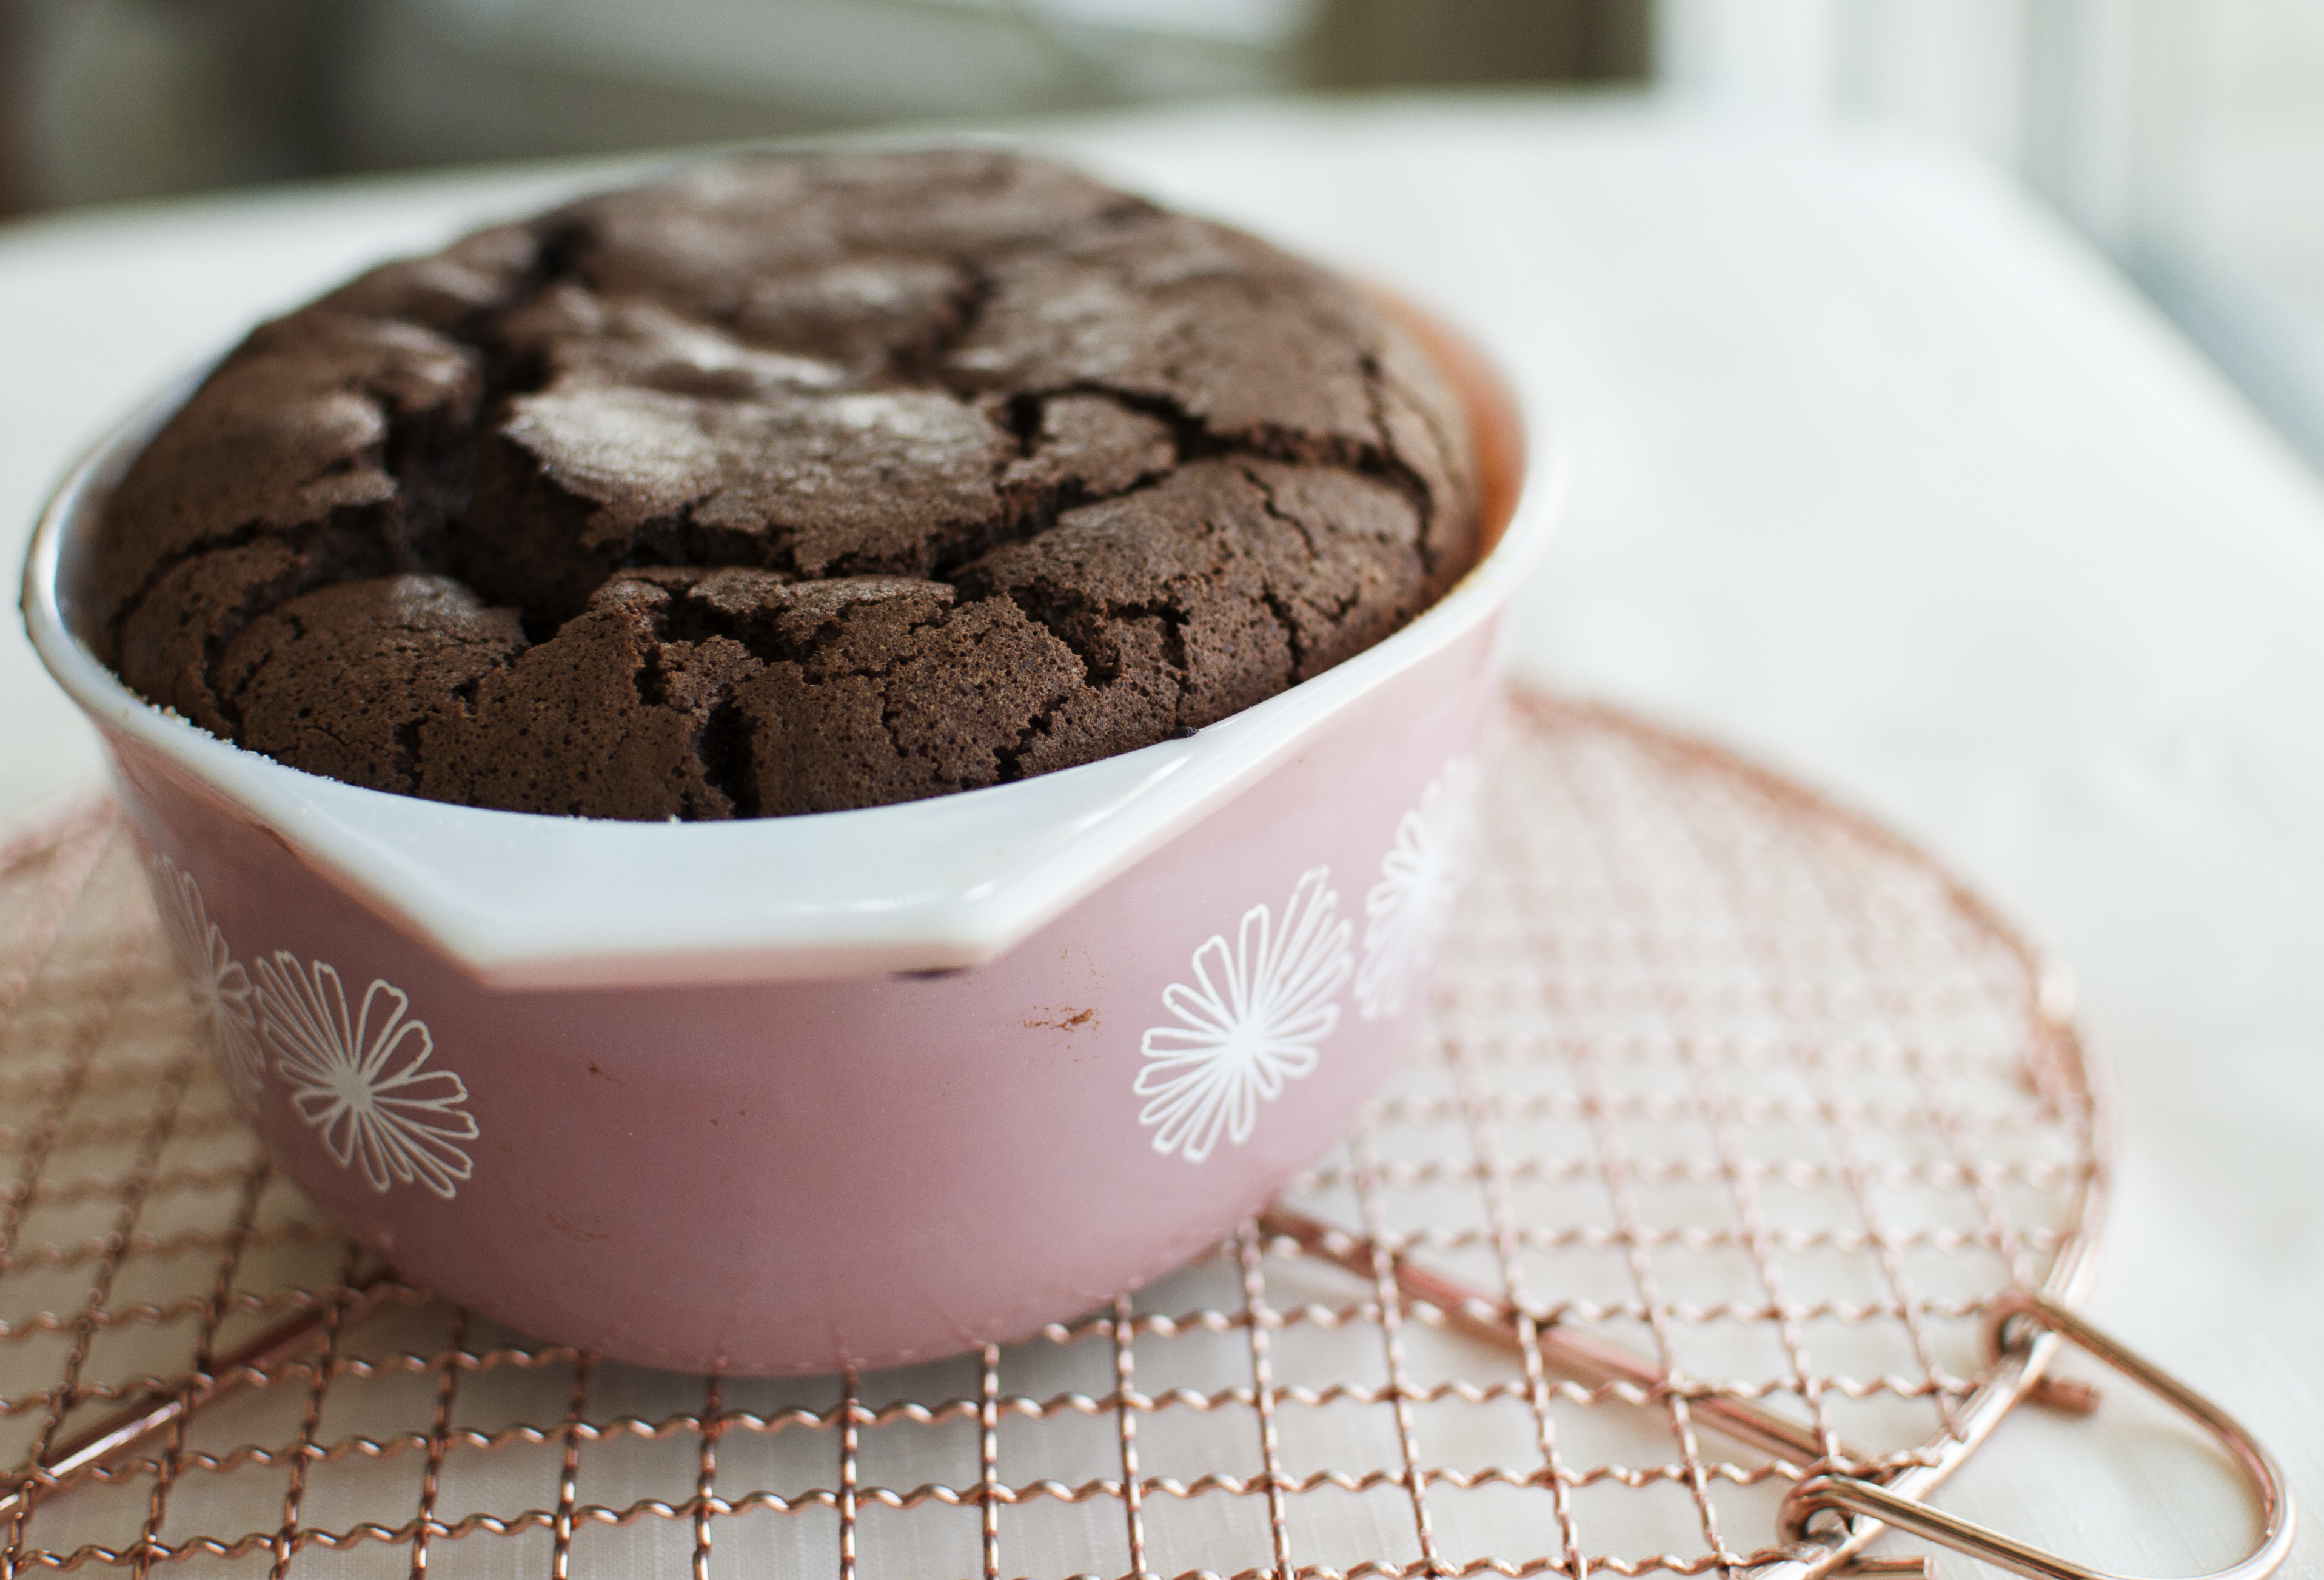
“Chocolate soufflé,” she said. I’d heard of soufflés before, but I’d never made one. They sound intimidating, but I did my research and figured out that they’re more simple than they seem. So, Belle and I spent Sunday afternoon conquering the chocolate soufflé. It was a fun learning experience for both of us, and of course ending up with a rich, chocolatey dessert certainly doesn’t hurt.
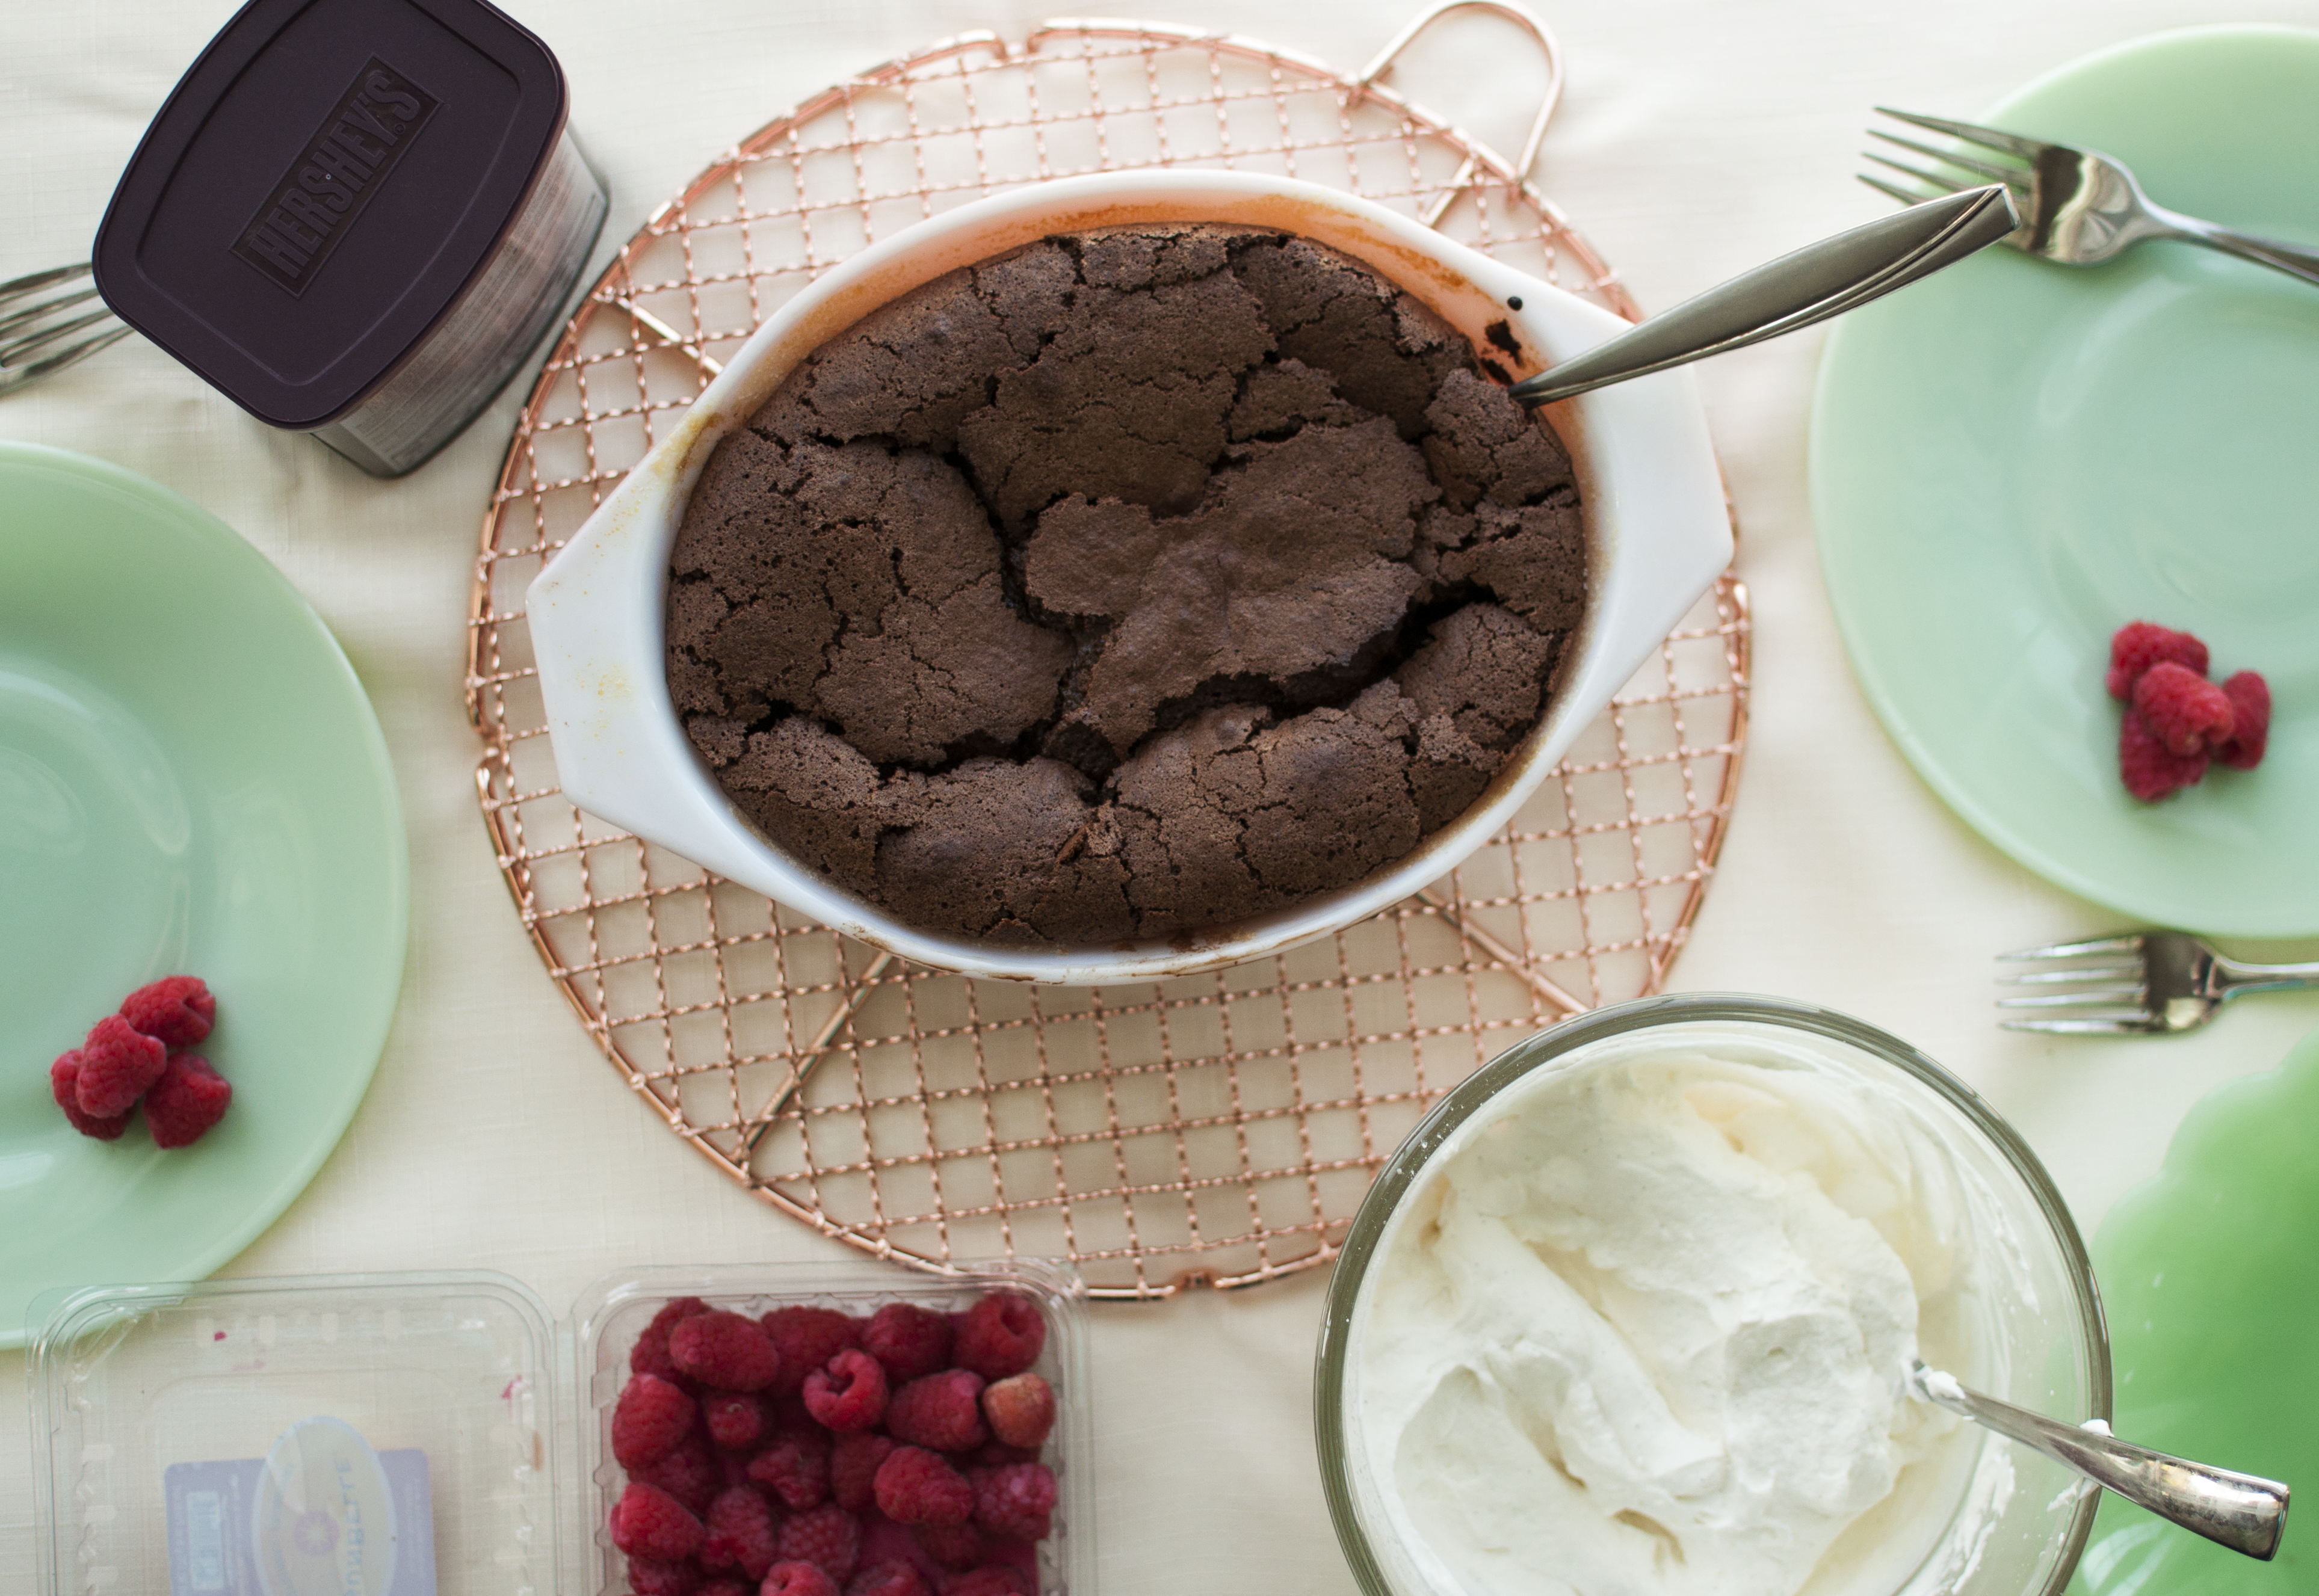
You’ll see in the photos throughout this post that we served our soufflé with homemade whipped cream and fresh raspberries. I liked how the whipped cream – while rich in its own way – helped to cut some of the sweetness of the chocolate soufflé. Plus, fresh raspberries just pair so well with chocolate, so that was pretty much a given.
{Note: I didn’t really change up The Kitchn’s instructions, listed below. I think they do a good job of spelling it all out for you. Mostly, I just wanted to share this experience and add a few of my notes mixed in. Enjoy!}
// // // // // // // // // // // // // // // // // // // // // // // // // // // // // // // // // // // //
Chocolate Soufflé with Vanilla Bean Whipped Cream.
Yield: Six individual soufflés in ramekins, or one large 1.5qt-sized dish.
For the soufflé:
Ingredients:
– 2 TBSP. unsalted butter, plus extra to grease the soufflé dishes
– 8 oz. bittersweet chocolate, finely chopped [I used Ghirardelli 60% cacao, and I think it worked well]
– 3 large eggs yolks
– 1/2 cup granulated sugar, divided, plus extra to coat the soufflé dishes
– 6 large egg whites
– 1 tsp. vanilla extract
– 1/4 tsp. coarse salt
Instructions:
- First, heat the oven to 375°F. You want your oven to be fully heated up and ready when it’s time to put the soufflé in.
- Prepare the soufflé dishes: Rub the insides of the ramekins or soufflé dish with butter. Coat with sugar by sprinkling a tablespoon of sugar in the bottom of each ramekin (or a scoop of sugar in the larger soufflé dish), and then tilting and tapping the dish to work the sugar into the corners and up the sides of the dish.
- Melt the chocolate: Combine the chocolate and 2 tablespoons of butter in a heatproof bowl. Set the bowl over a small saucepan of barely simmering water; make sure the bottom of the bowl doesn’t touch the surface of the water. (Alternatively, use a double-boiler.) Melt the chocolate, stirring occasionally, until completely smooth.
- Cool the chocolate slightly: Remove the chocolate from heat and stir in the vanilla and salt. Let the chocolate cool until still very loose, but just slightly warm to the touch [you don’t want scrambled eggs, so make sure it’s cooled before you add the yolks].
- Whisk together the yolks and 1/4 cup of sugar: Transfer the yolks to a mixing bowl. Measure out 1/4 cup of sugar and sprinkle over the yolks. Whisking by hand or in a stand mixer with a whisk attachment, whisk the yolks and sugar together. They will start off bright yellow and will gradually lighten. The eggs and sugar are ready when light yellow in color, and the mixture forms ribbons that hold for a few seconds on the surface.
- Combine the chocolate and the yolks: Pour the yolks over the chocolate. Use a spatula to gently fold the chocolate and the yolks together until completely combined.
- Beat the egg whites until frothy: Clean your mixing bowl thoroughly and make sure it is dry and free of any grease. Add the egg whites. Beat at gradually increasing speed until the whites are quite frothy and opaque.
- Add the sugar to the whites and beat until stiff peaks form: With the mixer running at medium speed, gradually add the remaining 1/4 cup of sugar to the egg whites. Once all the sugar has been added, increase the speed to high and beat the whites until they form stiff peaks.
- Lighten the chocolate base: Scoop about 1/4 of the beaten egg whites into the bowl with the chocolate base. Stir them in until no visible egg whites remain. This lightens the base and makes it easier to add the rest of the egg whites without deflating them too much.
- Gently fold the egg whites into the base in two batches: Scoop half of the rest of the egg whites on top of the chocolate base. Using your spatula, cut through the center of the mixture, scoop the spatula underneath, then gently lift and flip the mixture over onto itself; this is called folding the egg whites into the base (it helps prevent deflating them too much). Give the bowl a quarter turn and repeat the folding motion. Once this batch is nearly incorporated, add the remaining whites. Continue until you see no more visible egg whites in the base.
- Divide the soufflé batter between the prepared ramekins.
- Bake until the soufflés are puffed and the tops look dry: Bake small soufflés for 18 to 20 minutes, or one large soufflé for 35 to 40 minutes [it took about 32 minutes for ours to finish baking].
- Serve immediately; it is best eaten right away.
For the whipped cream:
Ingredients:
– 1 cup chilled heavy whipping cream
– 3 TBSP. powdered sugar, or to taste
– 1 tsp. vanilla bean paste
Instructions: Add all ingredients to the bowl of a stand mixer, fitted with the whisk attachment, and mix until medium peaks form. Store in the fridge until ready to use [homemade whipped cream is also best eaten the day it’s made].
+ Recipe resources: The chocolate soufflé recipe is from The Kitchn, and the whipped cream recipe is adapted from KitchenAid.
Leave a Reply