• Home
  • Who Am I?
  • Sides
  • FAQs + Disclaimers
  • Contact

Darcie Bakes //

March 4, 2016

Random Sides // Choose Butter Over Bros.

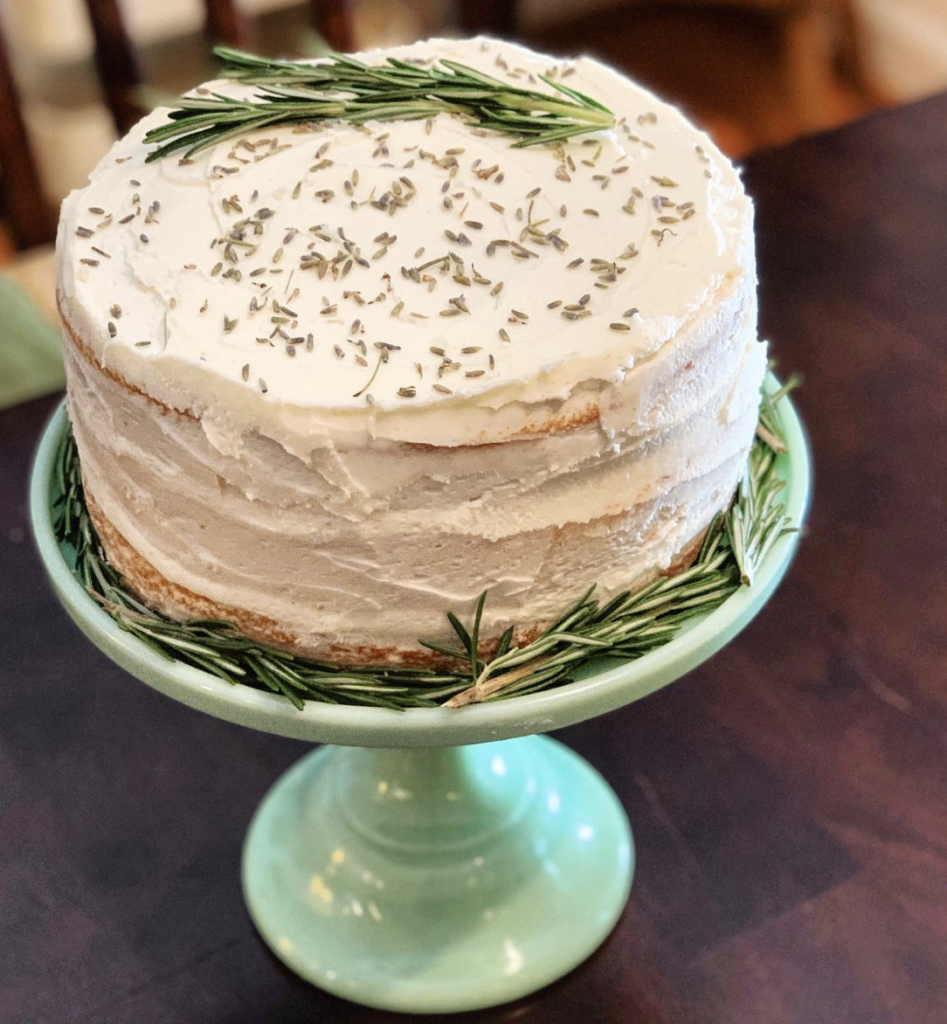
Sometimes I really love playing around in Photoshop and Illustrator. I’m no graphic designer, but I’ve got a soft spot for typography. Graphic design – for me – is very much like baking. It’s the perfect combination of utilizing my technical (left) brain along with my more creative (right) brain. Here’s one sample of something I’ve been up to lately. Of course I had to tribute my beloved butter.

butteroverbros
{Butter graphic by Tom Glass, Jr., via The Noun Project. Print created by me. Inspiration via 100 Days of Fonts.}

More baking posts coming soon; just thought I’d share some fun inspiration in the form of graphic design! <3

Leave a Comment Filed Under: art, butter, graphic design, randomness

January 26, 2016

Lemon Loaf Cake with Lemon Glaze.

As a presumed side effect of all my baking shenanigans over the years, I have come to learn [and accidentally memorize – my memory is weird; I swear I don’t keep creepy files on anyone!] my coworkers’ and friends’ food preferences. Apparently some people don’t like citrus, or at least not in their baked goods. What? Who ARE you people? I really try to be nonjudgmental, as everyone’s tastes are different. I’m also a huge fan of citrus: orange, grapefruit, lemon, lime… I love them all. So, so good. In my cooking, in my baking, in my smoothies, and just in general. Maybe I’m biased. But I just don’t get it. What is not to love about lemon, or any other citrus fruit for that matter?

lemonloaf_cover
{No, the cake doesn’t have Rogue’s Voodoo Doughnut Lemon Chiffon Crueller Ale in it. Although that does put some fun ideas into my head… I just like using the empty bottle as decoration; it’s such a fun color of bubblegum pink!}

loafcracksnglaze

All that to say, if you don’t like citrus – particularly lemon – then you should probably run away from this blog post right now (I’m still trying so hard to not judge, but it’s just one of my weaknesses in this case). Because I’ve already professed my undying love for lemons and citrus fruits – and now I’m about to delve even deeper.

inloafpan

This lemon cake was absolute perfection. I mean it. It’s perfectly moist, tart, and bursting with lemon flavor. It’s apparently a Starbucks copy cat, but I can’t say that I consume Starbucks’ baked goods very often – so I can’t vouch for that comparison. The cake is sweet enough, but not cloyingly sweet. The glaze locks in the moisture and adds the best lemon zing possible. Actually, I took this particular loaf cake to my day job, and I only ended up eating one small slice since I gave the rest away. I’m still kicking myself for that because I really wish I had the opportunity to eat more. Oh well. I guess that’s an excuse for me to make another loaf, huh? 😉

sidewaysslice

PS: If you don’t like citrus – can you please enlighten me as to why you don’t like the flavor? Despite the fact that this post is riddled with sarcasm, I actually don’t mean to sound snobby when I ask that question. As someone who practically loves every flavor known to (wo)man, I just don’t understand why people don’t like citrus. Seriously. Inquiring minds want to know. 🙂 And I’d also argue that even if you think you don’t like citrus in your baked goods, you should still give this loaf a chance. You might find that you’re pleasantly surprised by it.

biteoutofslice
{Chomp!}


// // // // // // // // // // // // // // // // // // // // // // // // // // // // // // // // // // // // // // // // //

Lemon Loaf Cake with Lemon Glaze.
Yield:
One 9×5″ loaf.

Ingredients:

For the loaf cake:
–
3 large eggs
– 1 cup granulated sugar
– 1 cup sour cream or Greek yogurt (I used full-fat sour cream, but apparently light is okay.)
– 1/2 cup canola or vegetable oil
– 2 TBSP. lemon zest
– 1 to 2 TBSP. lemon extract, to taste (Yes, tablespoons; do not use lemon oil or lemon juice in place here; pure lemon extract is necessary.)
– 1 1/2 cups all-purpose flour
– 2 tsp. baking powder
– 1/2 tsp. salt, or to taste

For the lemon glaze:
– 1 cup powdered sugar
– 3 TBSP. fresh lemon juice, or as necessary for consistency

Instructions:
1. Preheat your oven to 350 degrees F. Spray a 9×5″ loaf pan with cooking spray, and line with parchment paper (or grease/flour the pan); set aside.
2. To make the lemon loaf: add the eggs, sugar, and sour cream to a large bowl and whisk well until smooth and combined.
3. Drizzle the oil into the first mixture, and whisk to combine.
4. Add the lemon zest and lemon extract and whisk to combine. {Note: You can add a bit less lemon zest/extract than what is called for if you find that it’s too strong. Remember to not substitute lemon oil or lemon juice in the loaf itself. Oil can alter the flavor, as it’s much more potent. Lemon juice has too much acidity and can alter the final results of the cake, so be sure to use pure lemon extract and fresh lemon zest for this!}
5. Next, add the flour, baking powder, and salt, and stir until just combined. Be careful to not over-mix. The batter will be slightly lumpy, but that’s okay; don’t attempt to stir them to make the batter smooth. Pour the batter into your prepared and smooth the top lightly with a spatula if necessary.
6. Bake the loaf cake for about 50-52 minutes, or until the top is domed, set, and a toothpick inserted in the middle comes out clean or with a few moist crumbs. {Note: If you find that the top is getting too browned, simply place a sheet of foil over the pan so it can continue baking through.}
7. Allow the cake to cool in the loaf pan on top of a wire rack for at least 30 minutes, then turn it out onto the rack to cool completely.
8. To make the lemon glaze: add the powdered sugar to a small bowl, and slowly add in the lemon juice. Whisk until smooth and combined. Feel free to experiment with the sugar to juice ratios for your desired consistency and flavor. I added more lemon zest to the glaze for aesthetics and an extra burst of flavor. Evenly drizzle the glaze over the cooled loaf, then slice and serve. Loaf cake should keep well for several days in an airtight container. Enjoy!

+ Recipe via Averie Cooks.

Leave a Comment Filed Under: cake, cake cake cake, lemon, quick bread, quick breads

January 11, 2016

Random Sides // Cooking for One: Part I [Tips + Tricks].

It recently dawned on me that I seem to get quite a few questions from my friends and acquaintances on my cooking shenanigans – particularly related to how I cook for one. I thought it might be useful if I compiled a post with all my tips and tricks that I’ve learned. Obviously, I am by no means an expert. I didn’t go to culinary school, and I make mistakes allllll the time. But I have been cooking – more or less – on my own for the last 10+ years, so it’s safe to say that I have learned quite a bit over time, mostly through trial and error [and a few cooking classes here and there].

This post is going to be divided into two separate parts, mostly because I can’t help but ramble on subjects about which I am constantly thinking. In this first post – aka Part I – I am going to just discuss my thoughts and some general tips and tricks. In the next post – aka Part II – I will add more resources for recipes and inspiration, so that’ll be filled with lots of links and pretty pictures. In the meantime, let’s get started with Part I!

cookingforone_graphic
{Graphic created by me. Garlic icon from The Noun Project.}

Part I: My General Tips + Tricks + Thoughts on Cooking for One.

{Obligatory Disclaimer: It should also be noted that about 77% of my diet is vegetarian-based, with some meat (mostly chicken and fish) thrown in along the way, so I keep my cooking relatively simple; I tend to not cook a ton of meat for myself. So… If you’re looking for tips on something like “steaks for one,” you’ll have to look elsewhere, as that’s not my area of expertise!}

// Benefits of Home Cooking for One:

  • Good life skill to possess: When you’re knowledgeable in a kitchen, it just makes you feel like such a badass. Throwin’ down in the kitchen like a boss makes me feel as if I am winning at #adulting, despite the fact that I still don’t understand the point of taxes (I’m only partially kidding). It’s just a great way to learn and grow as a person. Heck, we all have to eat; might as well make the most of all this planet has to offer us as far as food is concerned, ya know?
  • Cost savings galore: Unless you’re shopping at Whole Paycheck – whoops, I mean Whole Foods – all the time, cooking at home is a great way to save some paper [and by paper, I mean money].
  • Cooking well can potentially impress a hottie: I mean… The ability to cook a good meal is hot, amirite? If you’re a good cook, then your significant other (or potential SO) is probably going to be pretty impressed. And who can blame ’em? 😉 Just some food for thought! [So many puns in this bullet point! Ha!]
  • It’s often healthier: When you cook or bake something yourself, you know exactly what goes into it. It then becomes easy to make healthier choices in regard to food. Don’t get me wrong; I still love comfort food (and I’ll cook it for myself with no shame) just as much as the next person. But it’s nice to know that, for the most part, I have complete control over what goes into my body.

// Darcie’s General Tips + Tricks:

  • I have loosely devised a “meal rotation plan,” and I (more or less) stick to it. From that rotation, I plan for and cook about two or three meals per week. Those two or three meals will get me by, depending on my plans for a given week [e.g. going out to eat with friends, working at the cooking school and getting fed, etc]. Note: I will share a sample meal rotation plan that I follow at some point on this blog, if y’all are interested. 
  • Cut recipes in half, and sometimes in half again: Most recipes make amounts that will serve 4+ people. Obviously, that’s pretty unnecessary for a single person (and even two people). When it comes to cooking, halving a recipe is easy. With baking, reducing recipes does get more tricky, so I usually tend to avoid that. However, as a general rule of thumb, any time I am looking at a recipe for a meal, I will automatically halve it just so that I don’t have so much darn food laying around. It greatly reduces food waste (which I hate), and it is better for portion control.
  • Sharing with friends: If you don’t want to or can’t cut a recipe in half, why not invite a friend or two over for dinner? You can cook together, or offer to do all the cooking and serve everyone dinner [tell a friend to bake some cookies or bring some booze in return!]. Eating is such a social activity for humans, so sharing your meals with others is a great way to bond, eat delicious, home-cooked food, and ensure that there’s less waste.
  • Learn to love leftovers: Orrr don’t. When it comes to The Great Leftovers Debate, I’m pretty sure that people either love or despise leftovers. There doesn’t seem to be much of an in-between. My opinion on leftovers is as follows: some things are fantastic for leftovers [e.g. chili and fried rice], but with most meals, I kind of hate leftovers. All that to say, as I get older, I have forced myself to tolerate leftovers a bit more, simply because it’s easier and more cost-effective to consume leftovers.
  • Grocery lists are your BFF: I’m a list maker at heart, but seriously, making a list of everything you need before you walk into a grocery store is extremely beneficial. It will keep you on task and ensure that you don’t buy all of aisle five. Think about what sounds good to eat for the week, then look up recipes and make a list of ingredients that you need. I also like to organize my grocery lists by section of the store. For example: all of my dairy items are listed together, all baking ingredients are written down together, etc. This keeps my scatter-brained self much more at ease when I’m shopping for ingredients.
  • The crockpot is also pretty nifty: If you are in your 20s or 30s and do not own a crockpot, do yourself a favor and go get one right meow! They come in all different sizes, and there are a boatload of recipes out there just waiting for you. Crockpot meals are usually pretty simple, and they’re often perfect for busy young professionals.

// Other Final Things to Note:

  • It’s okay to go out to eat. I try to limit how often I go out to eat, but since I’m a self-proclaimed foodie, it’s probably pretty obvious that I enjoy trying out new restaurants. And I’ll admit it: I even give into my sick, vile Arby’s craving once every month or two [dem curly fries doe]. All of these things are fine in moderation; I just prefer to cook my own meals about, oh, I’d say 87% of the time. I will say that it is much easier to forgive myself for giving into my occasional curly fry craving when I know that I cook/eat mostly healthy meals.
  • It’s okay to not know what the heck you’re doing: Cooking seems to baffle many folks, but most of it’s not that difficult to figure out. We have almost no excuse to not try to learn how to cook nowadays, with all of the online resources (blogs, Google, YouTube videos), etc.
  • Be open to learning new things, and definitely be creative and have fun with it: Don’t take cooking [or yourself for that matter] too seriously. Again, everyone has to eat to survive, so you might as well goof around and have fun with something that’s essential to your survival and health! Sometimes I’ll be a total dork and pretend I’m on a cooking show. Other times I will practice mindfulness when I’m cutting up a dang sweet pepper.
  • The bottom line is this: If you can pay attention to the science behind food and know how to follow directions, then you’re golden: With those skills, you can learn how to cook pretty well, especially for a single person. All it takes is a little determination and practice!

*Got any of your own hints/tips/tricks when it comes to cooking for a single person [or even two people]? Let’s hear it!

*Note: Part II – “Resources + Inspiration” – featuring some sweet Instagram pictures of my favorite dishes – is coming soon! Stay tuned! 🙂

PS: This post is dedicated to my good friend Adam! #yaaaaassss

Leave a Comment Filed Under: cooking, tips + tricks

January 6, 2016

The *Best* Chocolate Cupcakes [With Cocoa Buttercream].

cupcakesmorninglight_withtext

I have made quite a few chocolate cupcakes in my baking days, but I think this recipe takes the cake {pun totally intended}. While I’ve never really met a chocolate cake that I totally hated, there are, of course, several requirements for my ideal chocolate cake. Those requirements are as follows:

  • It has to be moist. Dry cake is just…Ugh. No one has time for that.
  • It must have a sinfully rich chocolate flavor. I don’t want a mere hint of chocolate; I want to be hit IN THE FACE with the chocolatey goodness.
  • It should have a nice balance of being light ‘n fluffy but also a tiny bit dense.
  • It should almost always be topped with some kind of chocolate frosting [I’ll accept vanilla bean frosting, though].
cupcakestopviewchoc
{Obligatory aerial view!}

Yup. Just like the ultimate vanilla cupcakes recipe from The Cupcake Project, this recipe was also tirelessly tested by tons of bakers all over the Interwebs. Obviously, I had to test out the recipe myself, and of course I was pleased with the end results. I can’t even recall for whom I made these cupcakes, but I’m pretty sure I ate at least two or three in one sitting regardless. I’d say that this is definitely my favorite chocolate cupcake recipe at this point in my baking life. The cupcakes hold up really well, and they’re super rich, moist, and perfectly chocolatey. No doubt, they satisfy my crazy chocolate cravings. If you’re craving some chocolate cupcakes, you should definitely make these. I’m salivating just thinking about them right now…. I guess that means I need to make them again soon. 😉

nekkidcupcake
{Mmmm… Cake.}

// // // // // // // // // // // // // // // // // // // // // // // // // // // // // // // // // // // // // // // // // // //

The Best Chocolate Cupcakes with Cocoa Buttercream Frosting.

Yield: Sixteen (16) regular-sized cupcakes.

Ingredients:

For the cupcakes:
– 1/4 cup unsalted butter, at room temperature
– 1 cup granulated sugar
– 2 ounces of your favorite chocolate [I like semi-sweet Ghirardelli for this, but you can use whatever as long as it’s pure chocolate and doesn’t contain any add-ins.]
– 2 large eggs, at room temperature
– 2 large egg yolks, at room temperature
– 1/2 cup + 1 TBSP. (4 1/2 fluid ounces) vegetable or canola oil, measured in a liquid measuring cup
– 2 tsp. pure vanilla extract
– 1/3 cup full-fat sour cream
– 1 cup all-purpose flour
– 1/2 tsp. salt
– 1/2 tsp. baking soda
– 1/2 cup cocoa powder [I prefer dutch-processed for this, but regular unsweetened cocoa powder will work as well.]
– 1 tsp. espresso powder [This is optional, but I prefer to add it for more caffeine and a deeper chocolate flavor!]
– 1/2 cup room temperature water, measured in a liquid measuring cup

Instructions:
For the cupcakes:
1. Preheat your oven to 350 F. Line two muffin tins with sixteen liners; set aside.
2. In the bowl of a stand mixer, mix butter and sugar until completely combined; it will look like wet sand.
3. Melt the chocolate in the microwave according to instructions, or over a double boiler. Allow the chocolate to cool to touch. Once cooled, add it to the butter/sugar mixture, and mix until it’s just combined.
4. Add in the eggs and egg yolks, one at a time, and mix until just combined.
5. Next, add in the oil, vanilla, and sour cream. Mix until just combined.
6. In a separate, medium-sized bowl, sift together the dry ingredients [flour, salt, baking soda, cocoa powder, and espresso powder]. Use a whisk to ensure that the dry ingredients are all well-incorporated after sifting.
7. Add the dry ingredients to the wet ingredients in three additions, mixing until just combined after each addition.
8. Add in the water, and mix until just combined. Scrape down the sides of the bowl with a spatula as needed to ensure that everything is properly incorporated.
9. Fill prepared cupcake liners about 2/3rds of the way full, and bake for about 18 minutes. Check for doneness at the 18 minute mark; a toothpick inserted in the center of a cupcake should come out clean (or with a few moist crumbs is also fine). If not done, bake for another minute or two until done.
10. Allow the cupcakes to cool completely on a wire rack, then frost as desired once they’re completely cooled.

*For the frosting: I used The Cupcake Project’s Vanilla Frosting Recipe. I simply doubled the recipe, and added probably about 1/3 cup of cocoa powder, plus some heavy cream to make it extra creamy. Feel free to play around with any frosting recipe that you like!

+ Chocolate cupcake recipe via The Cupcake Project.

cupcakesammich
{A cupcake sammich! Yaaaassss.}

2 Comments Filed Under: cake, cake cake cake, chocolate, cupcakes

January 3, 2016

Random Sides // Cheers to 2016.

I’m certain that I have mentioned before on this blog that I’ve never been big on New Years’ Resolutions. Last year, I actually did write some out [see them here if you’re so inclined]. But what I am finding as the years roll on is that – more than anything else – things change.

cheerstonewyear2016
{Image via yours truly. Yay for glitter pattern overlays in Photoshop!}

When it came to my 2015 goals, I did achieve some of them… But most of them just got altered or forgotten about in some way.  Of course, some of that is on me – my issues, my tendency to be lazy about some things, my flaws and shortcomings – but it’s also just because so many things changed in 2015. 2015 had a lot of ups and downs, just like every other year, however, many aspects of my life just changed so, so much.

That’s why I have decided to take a slightly different [perhaps more sustainable?] approach to my goals for 2016. Instead of creating new, concrete goals, I have decided to make a list of things that I want to continuously work on improving throughout this year. While it’s always lovely to have that sort of “mental reboot” that a new year brings about, I also think it’s important to create sustainable practices for a better life. Mostly, I want to just continue focusing on improving who I am as a human, with a huge portion of that focus on self-care. My thoughts are below.

+ Darcie’s 2016 Goals / Resolutions to Continue Growing and Rolling with Life’s Changes:

  • Eat a more “clean” diet. My diet is fairly healthy and well-balanced, all things considered. Still, I have my vices, and I could work to eat more cleanly. To do this, I’m trying to incorporate more simple, whole foods into my diet (e.g. more fruits/veggies, less artificial/refined sugars, etc). I also really need to quit being such a slacker when it comes to breakfast! Why is it the “most important meal of the day,” yet also the one that’s the hardest with which to maintain a dang routine?! Here’s to hoping some tasty green smoothies will be my savior in the mornings [and no, a cup of coffee is not an acceptable breakfast].
  • Get back into yoga. I was doing pretty well with attending yoga classes last year, but my budget had a major hiccup, and sadly, my [not the cheapest] yoga classes had to go first with my budget cuts. However, this year I’m doing better financially, and I am going to start attending classes again twice per week. I’d also like to work to build a yoga practice at home, but I’m not in a huge rush with that just yet.
  • Try a few new fitness activities. Even if I decide I hate spinning, it never hurts to try something new. It’s important to stay active, and I’m more of a “try to stay active and let the rest work itself out” type of person than I will ever be a gym rat. My goal for 2016 is to try at least one new fitness class, just for the heck of it. First on the list is a spinning/pedaling class, as soon as I have the budget for a class card [for those who care, this will probably be at some point in February].
  • Read more books. I’m not sure if I want to set a specific number of books to be read, but I do need to make the goal somewhat more concrete. “read more books” could mean reading two books throughout the entire year, and that seems silly. For now, I’ll simply make it my goal to read at least one book per month. That seems doable; it’s a good way for me to relax, learn more, and to not rip my hair out trying to accomplish too much.
  • Travel more within the U.S., as time and budget allow. As far as “TREAT YOSELF” activities are concerned, I have decided that 2016 is the year for tattoos and domestic travel. I’m in the process of [slowly] planning another international trip for 2017 (sup, Ireland?!), but for now, I need to focus my traveling shenanigans to right here in the good ol’ U.S.A. There is still so much of this gigantic country that I’ve never seen, so here’s to enjoying the culture right here at home.
  • Continue improving finances. This goal is all about learning to save more money and reducing debt, plus just using better practices when it comes to money. I had quite a few scary problems with money last year [largely self-inflicted issues], and I don’t ever want to go through that again. Finally, I’m getting myself back on the right track, and I want to continue to pay off my debt and live more within my means. {Read: I’m a 20-something who realized she was not actually “makin’ it rain,” as she previously and very naively thought. Ha.}
  • Build more confidence in myself and continue on my quest to radically love myself and who I am/who I’m becoming. A manager recently told me, “You have serious talent, and so much potential, and I can tell you’re very intelligent. We just need to figure out how to get you to tap into it.” Self-love is tough for me, especially with managing depression/anxiety. But I know that I (and you, too!) have the potential to do so much more, if only I’d just believe it. I have spent far too long doubting and hating myself, so 2016 is the year in which I really get into lazer focus mode when it comes to my mental well-being.
  • Cultivate existing friendships and be a better friend to others. Friendship is, of course, a two-way street. I’m also one of those people who is a little too inwardly focused, especially as someone who leans far more toward the introverted end of the personality spectrum. But this year, I’m trying to work on existing friendships and continue being a better friend. I have a feeling that I (very unintentionally) come off as a bit of an a-hole sometimes when I neglect friendships, so I’m working on being there for the people who have proven themselves loyal friends. Small things even make a huge difference: such as just making sure people get home safely, checking in on people to see how they’re doing mentally, etc.
  • Continue baking and trying new challenges within baking. I mean, obviously. *hair flip emoji* I’m going to be attempting more challenging baking feats this year. French macarons, bagels, multi-layer, frosted cakes, and croissants!? Here I come! 😎

Aight, whew. That was a novel…So let’s discuss. How do you feel about goals and resolutions? Did you set any for this year, or do you think new years’ resolutions are for the birds?

Leave a Comment Filed Under: goals, inspiration, life, NYE, randomness, sides

December 27, 2015

Challah French Toast.

challahfrenchtoast_cover

French toast is one of those breakfast foods that I rarely eat. Obviously, it’s delicious. I tend to eat pancakes and waffles more often; French toast is a breakfast that’s been relegated to that “fancy schmancy breakfast” category in my brain. And that’s kind of silly, is it not? After all, French toast is basically just egg-fried bread.

friendsgivingmas
{Several weeks back, I made the challah French toast for a “friendsgivingmas” feast. I had it plus homemade breakfast pizza, bacon, hot cocoa spiked with Bailey’s, and some delicious Califia Farms orange juice [my current favorite orange juice by far]. Yum!}
French toast, does however, require specific breads to be delicious. My usual go-to, store bought (gasp!) bread is a simple, whole wheat/whole grain (sometimes a honey oat wheat) bread, and that would not translate well to French toast. If I’m going to make French toast, then at least some preparation and forethought has to be involved. I guess that’s why I don’t eat it very often. As a single person, I can’t exactly have an entire loaf of Texas toast bread or challah or brioche laying around… Because I would eat it all on its own before even getting around to using it for the dang French toast!

challah_sideview

But every now and then, I get a fierce craving for some homemade challah (recipe coming soon!). I absolutely love making and eating challah. My current go-to recipe makes two loaves, so after I’ve pawned a bunch of it off on other people, I always end up having extra challah. It should be considered a cardinal sin to waste something as delicious as challah, and it just so happens that stale challah is perfect for making French toast! Challah is already an egg-based bread, so it just makes sense that frying it up in an egg-based mixture will bring it back to life.

topviewfrenchtoast
{Aerial views of food are my favorite.}

The recipe for this challah French toast is basically my original recipe (although I’m sure the same recipe exists somewhere out there), but it is adapted from the infamous Ina Garten. I made it for a “Friendsgivingmas” [my roommate made up that word, haha] feast a few weeks ago, and it was a hit! It should go without saying that starting with something already delicious [aka challah] and repurposing it with a few ingredients will make it that much more delicious.

This challah French toast is still soft and moist on the inside, but it’s got that perfect, golden brown crunch on the outside. With the orange zest, vanilla bean paste, and cinnamon, it’s spiced and flavorful in just the best way possible. I especially love the French toast with fresh blueberries and strawberries, a slight dusting of powdered sugar, and a dash of real maple syrup. Now that’s a fancy-ass breakfast [or Friendsgivingmas dinner] that’s worth splurging on every now and then. 😀

// // // // // // // // // // // // // // // // // // // // // // // // // // // // // // // // // // // // // // // //

Challah French Toast.

Yield: A lot. Haha. This will easily serve six people. It tends to reheat well as leftovers, too. In fact, I was nuking leftovers at work the next day.

Ingredients:
– 7 large eggs
– 1 cup half-and-half
– 1/2 cup 2% (or whole) milk {Note: You can sub all half-and-half or all milk. I just prefer that the fat content is at least 2% or higher.}
– 1 tsp. grated orange zest
– 1 tsp. vanilla bean paste (or sub pure vanilla extract)
– 1 TBSP. good-quality honey
– 1/2 tsp. salt
– 1 tsp. ground cinnamon
– 1 large loaf challah or brioche bread {Note: I used my homemade challah that was beginning to go stale. I will be posting the recipe for this soon, but you can opt for store bought challah. I won’t judge you too harshly if you choose to go this route. 😉 }
– Unsalted butter and vegetable oil for frying
– Optional toppings: berries (strawberries and blueberries pair wonderfully with this!), powdered sugar, and real maple syrup.

Instructions:
1. Preheat your oven to 250 degrees F.

2. In a large, shallow bowl, whisk together the eggs, half-and-half/milk, orange zest, vanilla, and honey. Whisk the cinnamon and salt in a separate small bowl, then add it into the liquid mixture.

3. Slice the challah into about 3/4-inch thick slices. Soak as many slices in the liquid mixture as possible for about 2-3 minutes, turning once.

4. Heat one tablespoon of butter and one tablespoon of oil in a large saute pan over medium heat. Add several soaked bread slices at a time, and cook for 2 to 3 minutes on each side, or until the slices are nicely browned on both sides.

5. Place the cooked bread on a cookie sheet and keep it warm in the preheated oven until ready to serve. Continue frying the bread as aforementioned in step four until it’s all fried up. You’ll need to add more butter/oil as time goes on to continue frying. Serve hot with fresh fruit, fruit preserves, powdered sugar, and/or real maple syrup.

+ Recipe adapted from Ina Garten, via The Food Network.

challahcloseup
{A closeup. I love how the berries look with the bread.}

Leave a Comment Filed Under: bread, breakfast, challah, french toast

December 25, 2015

Random Sides // Merry Christmas!

Hey y’all.

Just wanted to take the time to say MERRY CHRISTMAS! And, as always, for those of you who actually follow me… Thanks for your support. I hope you’re all enjoying the holidays and having a wonderful, safe, relaxed time with your loved ones.

MERRYXMASDARCIEBAKES

xoxo – Darcie 🙂

<3

Leave a Comment Filed Under: christmas, holidays, randomness

December 23, 2015

Candied Pecans.

candiedpecans_cover
{Merry Christmas, ya filthy animal!}

Stop the presses. Hold the phone. Shut the front door. <insert other “OMG” phrase here that I can’t think of at the moment.>

I’m gonna need you to stop what you’re doing right this instant and grab the supplies needed to make these candied pecans. There’s a good chance that you already have all of the ingredients in your pantry, minus the pecans.

candiedpecans_topviewThese candied pecans are serious business. Seriously delicious business, that is. I can’t get over how good they are. I have mentioned before that I’m not the most easily excitable person on the planet. But these things blew me away. They are so simple, so easy to make, and so unbelievably addictive. About a month ago, I made a batch to send my dad half of them in the mail for his birthday. He and my grandpa informed me that they were the best part of his birthday baked goods package, that they’re “dangerous,” and delicious. Update: While I was at their house during Christmas break, my grandpa said, “Those candied pecans ought to be outlawed!” That dude is known for speaking his mind, so he obviously knows what’s up: they’re so good that they should be outlawed. 😉

candiedpecans_closeup
{Candied pecans aren’t the most photogenic, but they sure are delicious.}

I’d be lying if I said I have any self-control around them. Once you start eating “just a few,” next thing you know you’ve eaten an entire cup. Oops. They’re just so tasty. Roasted pecans, topped with a delicious, crunchy sugar coating that has a good hint of cinnamon… How could that ever be a bad thing?

Candied pecans are also extremely versatile: you can use them as a salad topping, gift them to your loved ones for Christmas, or just make a batch and try to play a game with yourself in which you don’t consume the entire batch in one sitting.

candiedpecanmountain
{This deer loves being on top of Candied Pecan Mountain. I don’t blame him. I’m jealous.}

Regardless of your reason for making these [tbh, you don’t need a reason], just make them. They are so tasty, and they will make your house smell heavenly. My apartment always smells fantastic when I’ve got these things roasting in the oven. Best snack ever. Make them right meow so you can eat them all Christmas weekend. The end.

// // // // // // // // // // // // // // // // // // // // // // // // // // // // // // // // // // // // // // // //

Cinnamon Sugar Candied Pecans.

Yield: 4 cups of the most delicious candied pecans on the planet.

Ingredients:
– 1/2 cup granulated sugar
– 1/2 cup light brown sugar
– 1 TBSP. ground cinnamon
– 1 tsp. salt
– 16 ounces (about 4 cups) unsalted pecans halves
– 1 large egg white
– 1/2 tsp. pure vanilla extract
– 1 tsp. water

Instructions:
1. Preheat your oven to 300 degrees F, and line a large baking sheet with a Silpat or parchment paper. Set prepared pan aside.
2. In a medium bowl, combine the sugars, cinnamon and salt. Set aside.
3.
In a large bowl, add the egg white, vanilla extract, and water together and whisk until frothy.
4. Add the cinnamon sugar mixture to your wet ingredients, and stir until combined. Toss with the pecans until they’re well coated.
5. Spread the coated pecans out onto the prepared pan in an even, single layer.
6. Bake for about 40-45 minutes, stirring every 15 minutes. The sugar mixture will harden on the pecans, especially as they setup and cool off.
7. Remove them from the oven and allow them to cool on the baking sheet. Once cool, store the candied pecans in an airtight container. They will be good for about a month, but it’s highly unlikely that they’ll last longer than a week.
+ Recipe from Two Peas and Their Pod.

Leave a Comment Filed Under: nuts, pecans, snacks

December 19, 2015

Single Lady Banana Bread.

One of my favorite guilty pleasure* hobbies OF ALL TIME includes listening to copious amounts of rap and hip-hop. Usually I can be found listening to lots of modern songs, but I am gonna go ahead and throw it out there: I have a “2000s Hip-Hop” station on my Pandora account, and it’s one of my favorite playlists to throw on when I wanna get pumped up.

*I actually have zero shame, tbh.

I mean, let’s be honest: who doesn’t like “Laffy Taffy,” “Salt Shaker,” “U and Dat,” and other songs?! They’re just classics for those of us that grew up in the early 2000s.

On the topic of 2000s Hip-Hop, do you remember the song “Independent” by a dude named Webbie? The lyrics are below:

“I-N-D-E-P-E-N-D-E-N-T.
Do you know what that means, man?
She got her own house, she got her own car.
Two jobs; work hard.
YOUSA BAD BROAD!”

Secretly, I’ve always liked to think that song was meant for me. I’ve always been a bit independent to a fault. I have two jobs right now, and I have my own car, and I pay my own rent. I like to think that makes me a “bad broad.” 😛

nannerbreadcoverIf you’ve made it this far in this post, you’re probably wondering what in the heck hip-hop music has to do with a food blog or better yet with banana bread. Well, this isn’t just any ol’ nanner bread recipe. This recipe is for one single miniature loaf of banana bread. It’s an adorable, delicious little loaf, perfect for a badass, independent chick (or dude) such as yourself. You could technically share it with your significant other, if you have one and felt so inclined. But it’s also a nice amount for one person.

nannerslicecloseupWell, I’m not gonna lie. I ate the entire loaf in what was probably more than a 24 hour period but less than a 48 hour period of time. It’s juuust the right amount of banana bread to satisfy a craving, plus use up that single overripe nanner that’s sitting on your counter, daring you to use it for something (but of course, one banana is never enough for a regular-sized loaf of bread).

nannerbreadfinalcloseup

Alright, now that rambling is over, go make a miniature loaf of nanner bread and listen to some good ol’ 2000s hip-hop songs while you’re at it. It’s a great way to use up a banana and feel like a total badass. Winning. 😎

nannerbreadslices
{Cute little slices of nanner bread on my favorite yellow gingham tray!}

// // // // // // // // // // // // // // // // // // // // // // // // // // // // // // // // // // // // // // // //

Single Lady Banana Bread.
Yield: One small loaf (a miniature loaf pan’s dimensions are usually about 5 ¾” x 3” x 2”).

Ingredients:
–
1 small (6-7”) over-ripe banana
– 3 TBSP. unsalted butter, at room temperature (plus extra for pan)
– 3 TBSP. granulated sugar
– 2 TBSP. honey
– 1 large egg yolk
– ½ cup all-purpose flour
– 1 TBSP. flax seed meal [Christina uses wheat germ, but I don’t ever keep any on hand. I always have flax seed meal, though. Personally,  I think a tablespoon or two of flax seed meal adds a nice, nutty flavor, with the added benefit of some extra nutrition!]
– ¼ + ⅛ tsp. baking soda
– Pinch of salt

Instructions:
1. Preheat your oven to 350 degrees F. Grease a 5 ¾” x 3” x 2” mini loaf pan with butter or cooking spray (and a little parchment paper!). Set aside.
2. In a medium bowl, mash the banana into a puree using a fork or potato masher, if you have one. Next, add the butter, sugar, and honey to it and stir well.
3. Stir in the egg yolk well. Finally, sprinkle in the dry ingredients: flour, flax seed meal or wheat germ, baking soda, and salt.
4. Bake for 35-40 minutes, or until a toothpick inserted comes out clean. Let cool in the pan slightly before moving it to a wire rack. Enjoy!

+ Recipe via Dessert for Two.

2 Comments Filed Under: bananas, bread, quick bread, single serving, small batch, small batch baking

December 8, 2015

RBE // Old-Fashioned Chocolate Cake Doughnuts.

I’m very fortunate and grateful to be able to say that I had a good childhood. In fact, one of my fondest childhood memories involves doughnuts. [Then again, any memory that involves doughnuts should be classified as a good one!]

chocdonescover
{Yes, we made a “D” doughnut. D is for Dani, Darcie, and Doughnuts!}

When I was a kid, nearly every Sunday before or after church, my parents would take us to this little local doughnut shop called Royal Donut. And every time we went there, I always consumed three doughnuts in one sitting (RIP Darcie’s childhood metabolism). Out of the three doughnuts I snarfed down, one of them had to be a double chocolate fried cake doughnut. Yes, every time I visited this doughnut shop (which was frequently), a double chocolate was a requirement.

clearglazedchocdone
{Doughnut with clear glaze.}

These fried chocolate cake doughnuts are reminiscent of my childhood. My favorite recipes are those that tend to have some kind of sentimental value. Whether the recipe is one that I actually did grow up making, or if the recipe reminds me of something I ate as a kid, there’s just something extra special about these kinds of recipes.

chocdonebiteMy roommate, her boyfriend, and I whipped up these doughnuts as an “RBE” (roommate baking endeavor) one Sunday a few months back. While I didn’t like them quite as much as I enjoy the old-fashioned sour cream doughnuts, this chocolate version is still pretty fantastic. They’re rich and cakey, and they fry up beautifully. The glaze is probably what makes them, as it seals in the moisture. We made a clear glaze to dip the entire doughnut in, plus I had to make a slightly thicker chocolate glaze to go on top of some doughnuts. The end result reminded me of my childhood, and I think that’s my favorite part about these doughnuts. I wish I could still inhale three doughnuts and not gain ten pounds, but alas. It’s still super neat that you can fry up a relatively small batch of doughnuts in your own kitchen – and let it take you back to your childhood.

doneholetrio
{Cute little doughnut holes!}
chocdonesaerialview
{An aerial view of our dones.}
chocdonestack
{Done stack.}

Isn’t it just beautiful how recipes and food can evoke so many pleasant memories? <3

doublechocsprinkles
{This is the doughnut that basically symbolizes my childhood: A fried chocolate cake doughnut with chocolate glaze + sprinkles.}

// // // // // // // // // // // // // // // // // // // // // // // // // // // // // // // // // // // // // // // //

Old-Fashioned Chocolate Cake Doughnuts.

Yield: About fourteen doughnuts, plus doughnut holes.
Ingredients:
For the doughnuts:
– 2 cups (226 grams) cake flour [We used a cake flour substitute.]
– 1/2 cup (40 grams) cocoa powder
– 1 1/2 tsp.baking powder
– 1 tsp. fine salt
– 3/4 tsp. ground nutmeg
– 1/2 cup granulated sugar
– 3 TSBP. unsalted butter, at room temperature
– 2 large egg yolks
– 1 cup (full fat) sour cream
– Canola oil, for frying
– Equipment needed: deep-fry thermometer
For the clear glaze:
– 3 1/2 cups (350 grams) powdered sugar, sifted
– 1 1/2 tsp. light corn syrup
– 1/4 tsp. salt
– 1/2 tsp. pure vanilla extract
– 1/3 cup hot water

For the chocolate glaze:
–
1 1/2 cups powdered sugar
– 4 TBSP. unsweetened cocoa powder
– 3 TBSP. milk or water
– 2 tsp. pure vanilla extract

Instructions:

Make the doughnuts:
1. In a medium bowl, sift together the dry ingredients: cake flour, cocoa powder, baking powder, salt, and nutmeg.
2. In the bowl of a stand mixer fitted with the paddle attachment, beat the butter and sugar together until a sandy consistency is achieved. Add the egg yolks, and mix until light and thick.
3. Add the dry ingredients to the mixing bowl in three editions, alternating with the sour cream, and ending with the dry mix. The dough will be pretty sticky.
4. Once the cohesive dough has formed, remove the dough from the mixer bowl and form a disc of dough on a sheet of plastic wrap. Wrap up the dough tightly, and chill for at least one hour, or until it’s a bit more firmed up.
5. When ready to make the doughnuts, roll out the chilled dough to about a 1/2 inch thickness. Use a doughnut cutter (or two different sized biscuit cutters) to cut out as many doughnuts as possible. Dip the cutters into the flour as necessary to prevent the dough from sticking. {Note: Don’t worry about imperfections; these things are not meant to look perfect.}
6. Pour two inches of canola (or vegetable) oil into a heavy-bottomed pot, and attach the thermometer to the pot. Heat the oil to 325 degrees F.
7. Fry the doughnuts a few at a time; be careful to not overcrowd the pot. You’ll need to fry each doughnut on each side for about two minutes. Allow the doughnuts drain on a paper bag to soak up the excess grease.

Make the glazes:
1. For both of the glazes, the process is basically the same: Mix all ingredients in a bowl with a whisk until smooth. Feel free to add a bit of corn syrup to the chocolate glaze for extra smoothness/shine.
2. As your doughnut are fried, immerse each doughnut into the glaze of choice.
3. Place the glazed doughnuts on a wire rack above a sheet pan to catch any excess glaze. Allow them sit for 20 minutes until glaze is set.
4. Doughnuts are best served the day they are made, but may be stored in an air-tight container at room temperature for a few days. Enjoy!

+ Old-fashioned chocolate doughnuts recipe from Handle the Heat.
+ Chocolate glaze recipe from Joy the Baker.

2 Comments Filed Under: cake, chocolate, donuts, doughnuts, fried, RBE

« Previous Page
Next Page »

Search.

Hello, World!

Welcome!
I'm Darcie. In a nutshell: I'm a baker and mental health advocate in the tech industry.
Darcie
Learn more about me here.

// // // // // // // // // // // // // // // // // // // // // // // //

Socialize.

Instagram is my fave.
Instagram Icon
Pinterest is cool.
Pinterest Icon
Tweet, tweet.
Twitter Icon

Subscribe.

Enter your email address to subscribe to this blog and receive notifications of new posts by email.

// // // // // // // // // // // // // // // // // // // // // // // // // // // // // // // // // // // // // // // // // // // // // // // // // // // // // // // // // // // // // // // // // // // // // //
Copyright © 2015 Darcie Bakes. All Rights Reserved.

Website designed by Darcie C., using the Beautiful Pro Theme.

Proudly powered by the Genesis Framework.