• Home
  • Who Am I?
  • Sides
  • FAQs + Disclaimers
  • Contact

Darcie Bakes //

November 11, 2019

Revitalizing the Blog: Currently // 11.11.2019.

It seems that blogging has kinda fallen by the wayside, particularly with the growing popularity of other forms of “faster” social media; in particular, Instagram. I’m still fairly active over there [@darciebakes], but as you can see, I have not posted on this actual blog since 2017.

Well, the past two years have been very interesting, to say the least.

I won’t go into great detail on that, or at least not for now.

Instead, let’s try my old method of my “Currently” posts to showcase what I’ve been up to in 2019.

From right to left:

Top Row:
// 01: I’ve been traveling quite a bit more, and I have developed a love affair with our National Parks. In February, I visited Arizona, and there were so many wild and cool-looking cacti at Saguaro National Park. The way this cactus glimmered in the sunlight was just magical.
// 02: Every time I visit my parents, my mom and I like to work on a craft project together. She and I are both creative and so it’s a great way for us to bond. I am terrible at sewing, so I help her with the prep work, while she does the machine stitching. During this visit, we made potholders (or hot pads) for cast iron skillet handles. They will come in handy for campfire cooking [which is another recently developed love affair].
// 03: I had the privilege of receiving the Weeknight Baking cookbook, by Michelle Lopez of the Hummingbird High blog, as part of the launch team. I have been testing recipes every chance I get, and these cheesecake bars with a mixed berry swirl were fantastic.

Middle Row:
// 01: I like to keep my personal life to myself the majority of the time. But I am so happy to be with a wonderful man. Being with the “right” person can make all of the difference in the world. In this photo, we’re visiting Minneapolis-St. Paul; what a cool Midwestern city!
// 02: Sometimes hiking is just what the doctor ordered; I’m loving outdoor exploration these days.
// 03: Getting back into a more regular baking routine makes my heart swell with joy. Pictured here are regular snickerdoodles and “carnival” snickerdoodles with lots of pretty sprinkles.

Bottom Row:
// 01: Another national parks photo in Voyageurs National Park, up in northern Minnesota. Fun fact: you have to access the park via boat from wherever you stay at (we stayed at a cabin resort). It’s very secluded and definitely underrated; such a peaceful experience.
// 02: Here I am in one of my favorite dresses, posing with a cute mural at a Nashville bakery. “Life can be sweet,” it says. Yes, it sure can be pretty sweet.
// 03: I will never not love a good brownie. Despite having a very non-discriminatory sweet tooth, brownies are still probably my favorite dessert. Because chocolate.

That’s all for now.

If anyone is actually reading this, I hope you are well.

<3

Leave a Comment Filed Under: Uncategorized

September 27, 2017

{Small Batch} Apple Turnovers.

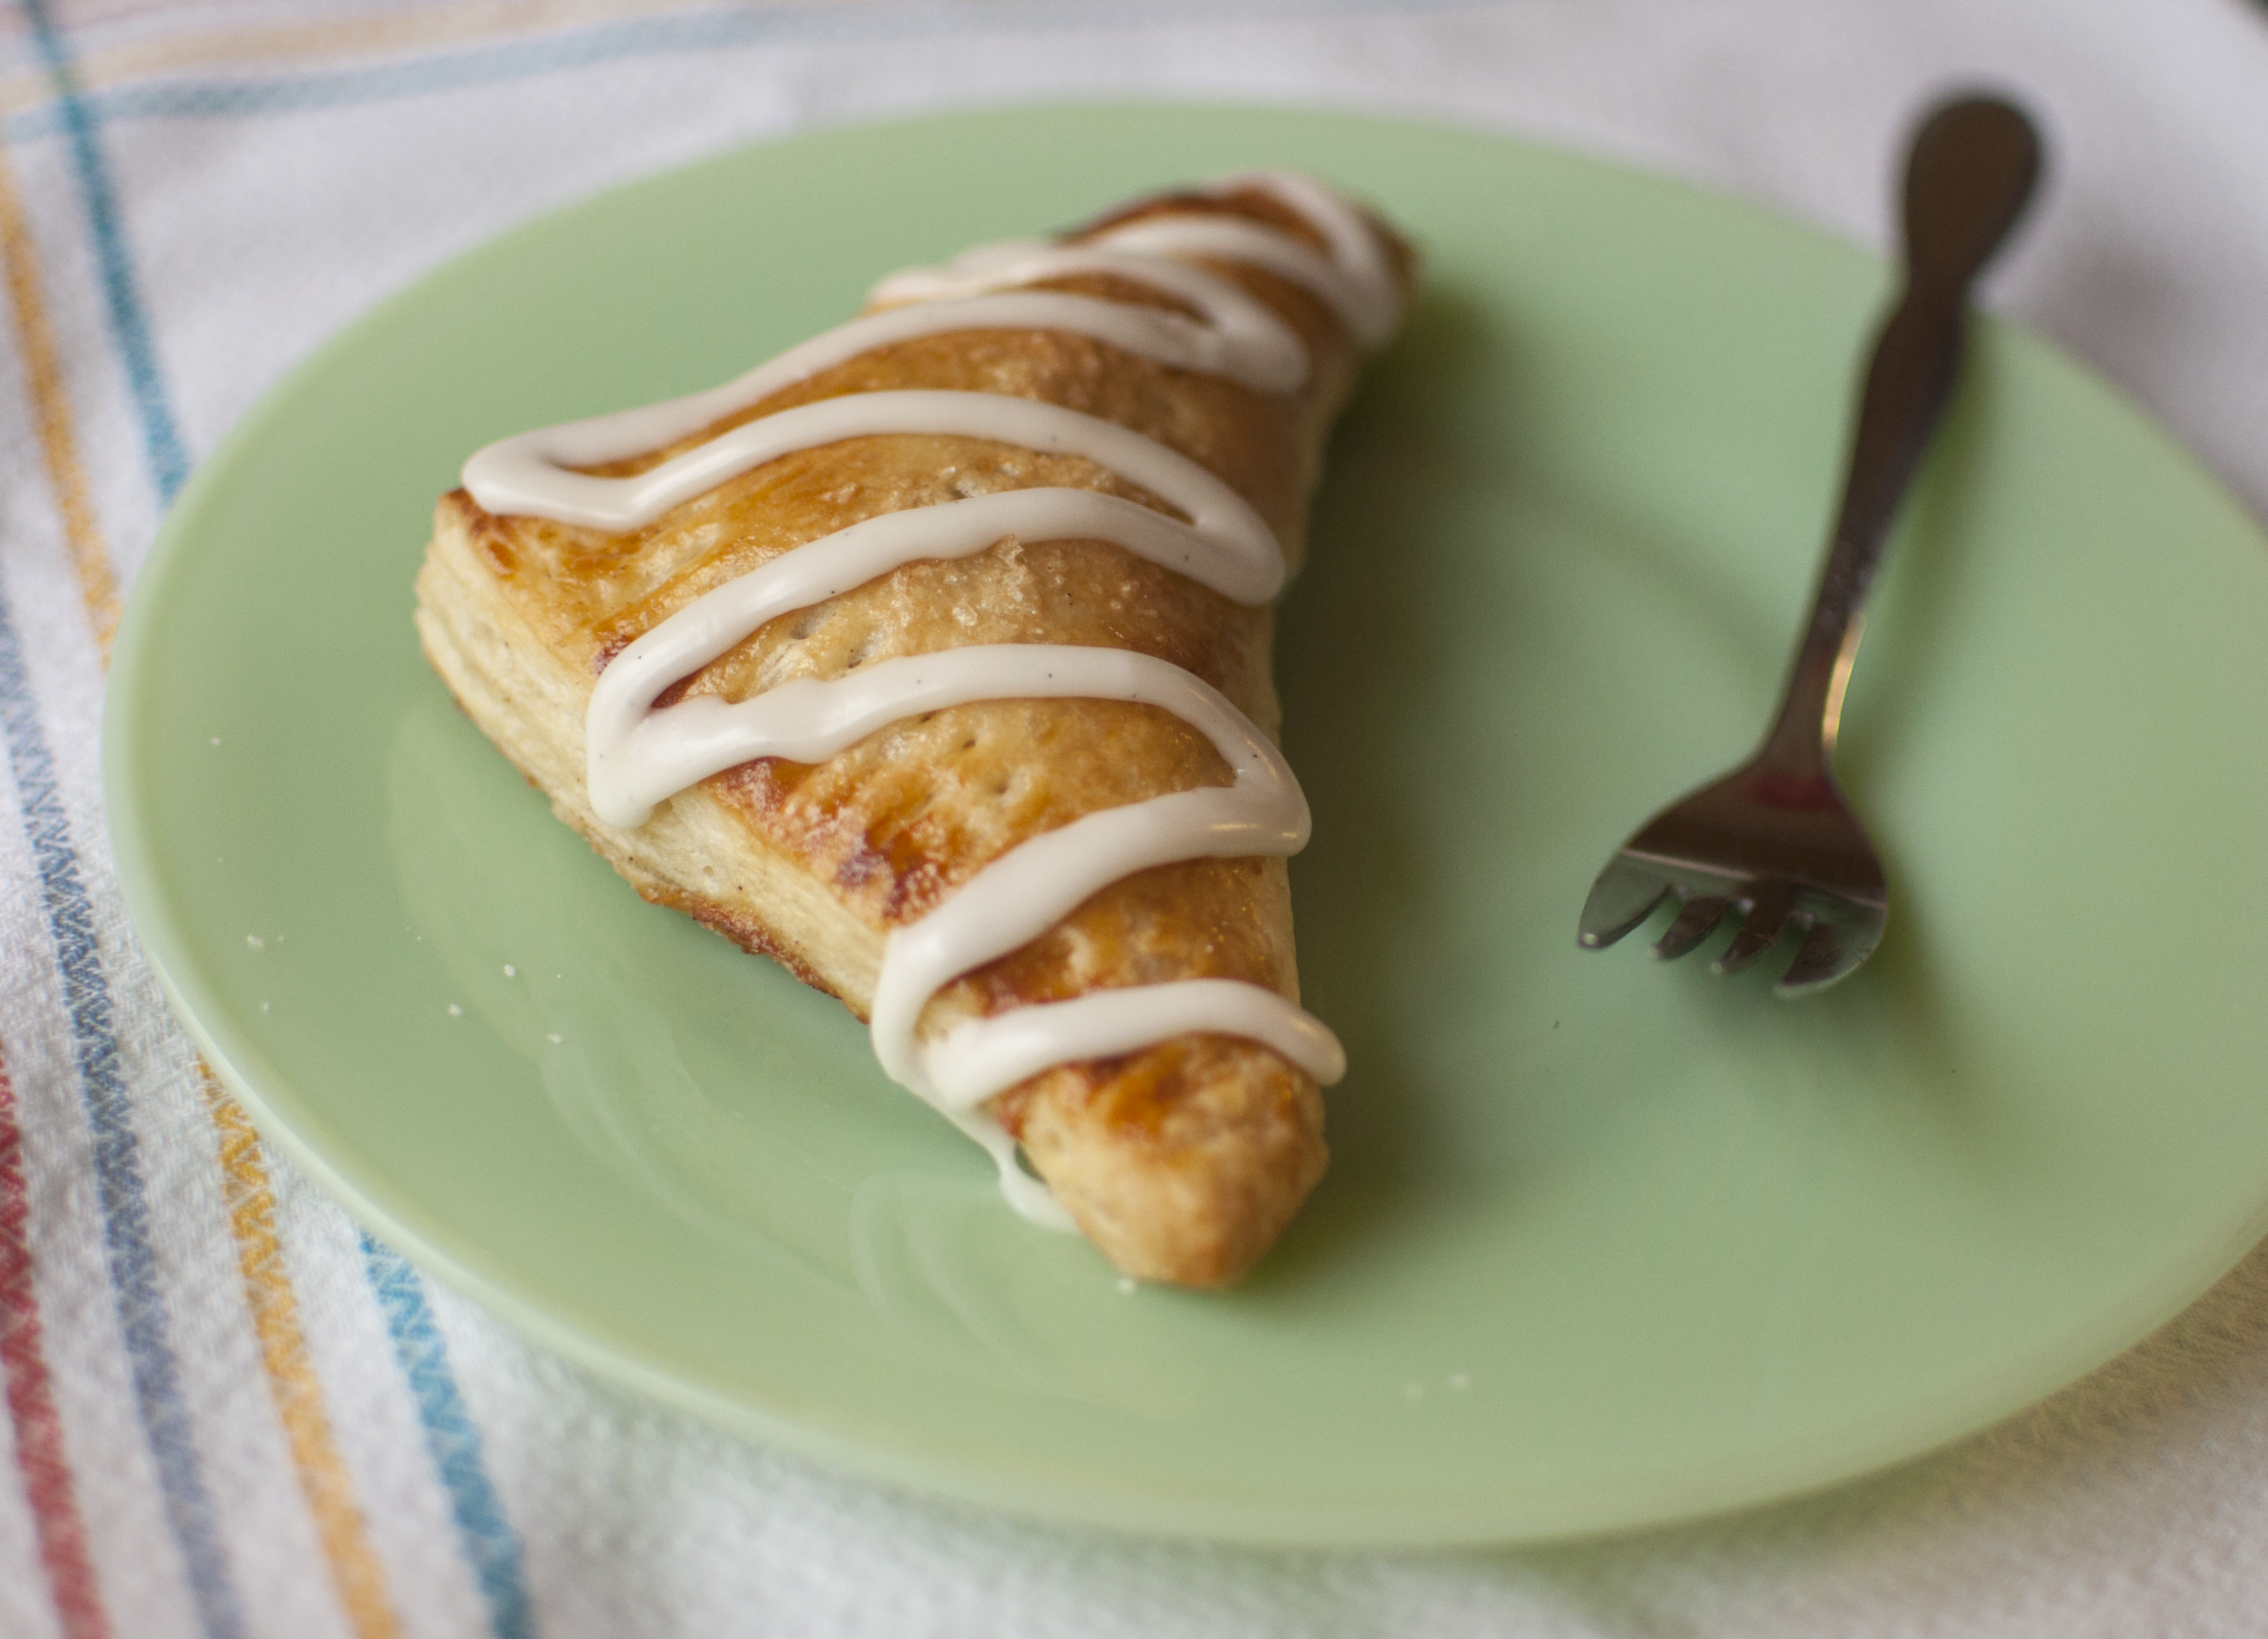
Apple turnovers are a fantastic fall and winter dessert. Honestly, they’re good any time, but I tend to make them more during the fall and winter months. Of course the weather is still a bit whack in St. Louis at the moment, but a girl can dream, eh? appleturnovers_coverI have made these turnovers a number of times, and I’ve been neglecting to share them with you [such a shame, honestly]. Butttt I figure it’s always better late than never when it comes to sharing foodstuffs on the blog. These turnovers are pretty similar to the pumpkin turnovers I made a while back. They use a small-batch puff pastry dough, and a simple apple filling. The glaze is also really easy; I usually add vanilla bean paste to it because I love the little brown specks that the vanilla bean seeds lend the glaze.

appleturnoveropen
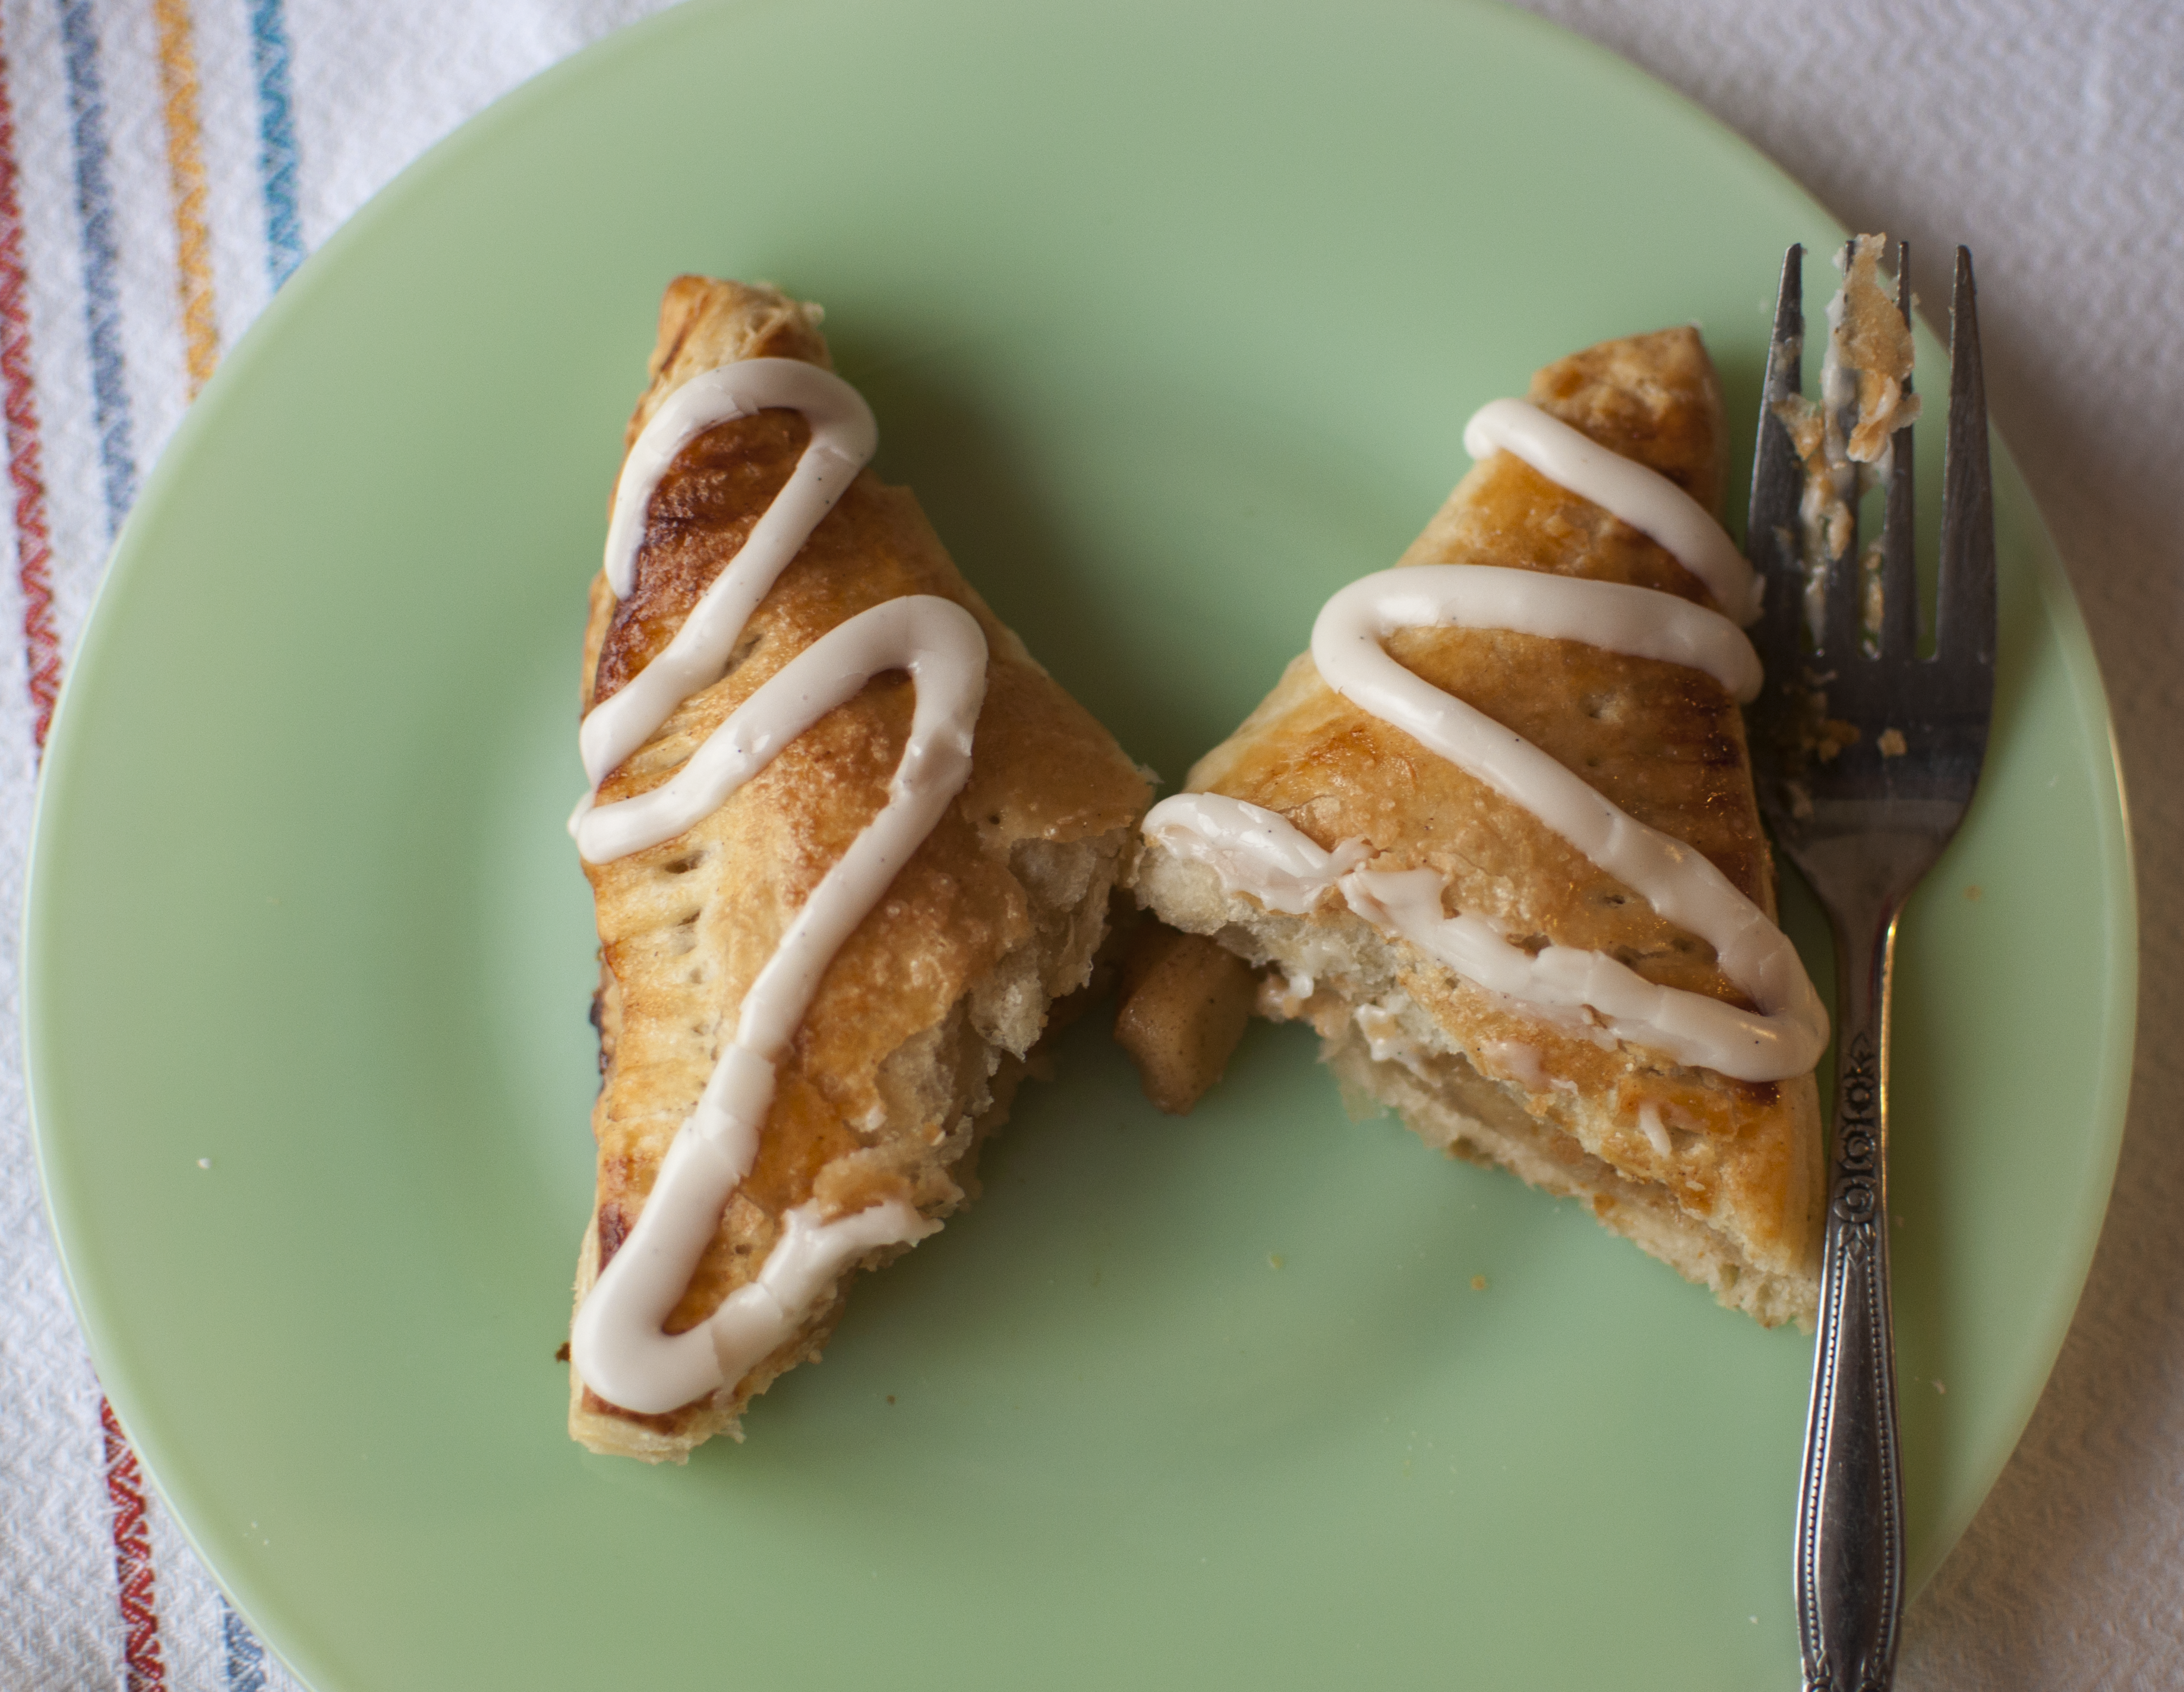
The best part about these turnovers is that they can easily be a make-ahead project. In fact, that’s exactly what I often do for these: I make the puff pastry and cook the apples one evening. The following morning, I assemble and bake them for my family. It’s pretty much perfection, and it’s really much easier than you might think.

openwithapples
{Dem innards.}

puffpastryprocess

// // // // // // // // // // // // //// // // // // // // // // // // // // // // // // // // // // // // // // // // // // // // // // // // // // // //

// Small Batch Apple Turnovers.
Yield: Four large triangular pies.

Ingredients:

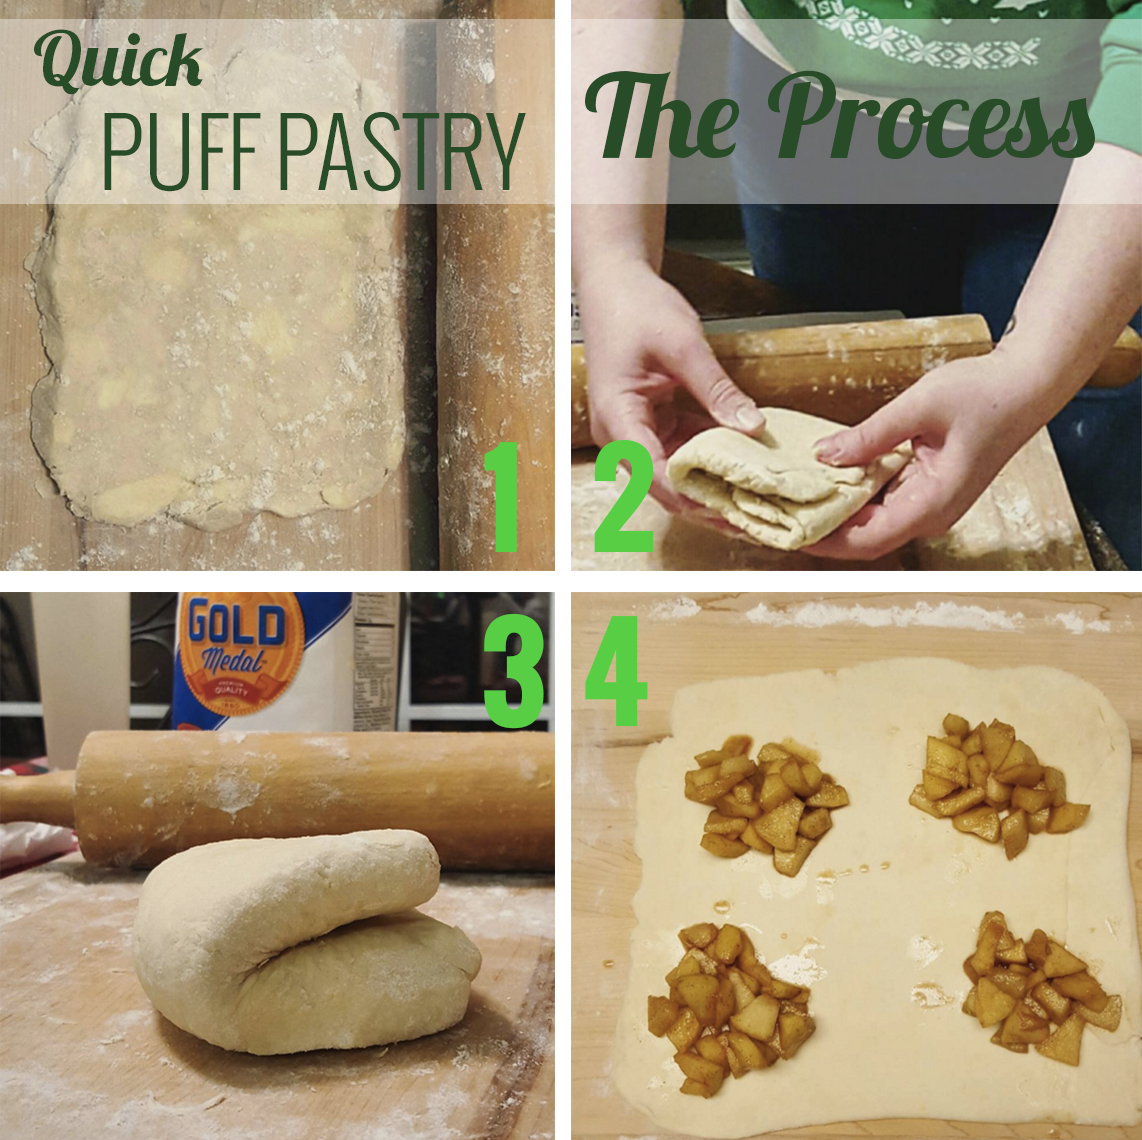
For the quick puff pastry:

  • 1 cup (125 grams) all-purpose flour
  • ¼ tsp. fine salt
  • 10 TBSP. high-quality butter (5 ounces), cold {I use unsalted Kerrygold.}
  • ⅓ cup ice cold water

For the apple filling:

  • 2 cups diced apples (from about 3 small apples, or 2 medium)
  • 1 tsp. ground cinnamon
  • dash of ground nutmeg {Just something I like to add here.}
  • 1 TBSP. freshly squeezed lemon juice
  • ¼ cup light brown sugar
  • 1 TBSP. unsalted butter
  • pinch of salt
  • 1 large egg yolk, beaten
  • coarse sugar (turbinado sugar) for sprinkling
 Instructions:
  1. Make the puff pastry: In a medium bowl, whisk together the flour and salt.
  2. Next, cube the butter and then add it to the flour bowl. Using a pastry blender, cut the butter into the dough. It will be very crumbly, and you’re done when the butter is in uniform pieces all about the size of peas.
  3. Next, make a hole in the center of the dough and pour in all of the water. Using a fork, stir to combine the dough. It’ll be a shaggy dough, similar to pie crust. This is okay.
  4. Flour a cutting board and rolling pin, and place the dough on the board. Pat it into a rough square. You will still see chunks of butter and it will seem too dry, but do not add extra water. The dough will come together with each roll.
  5. Roll the dough out in front of you into a rectangle about 10″ long; you don’t need to be especially precise at this point.
  6. Fold the bottom third of the dough over the middle of the dough. Fold the upper third of the dough on top of the middle too, like an envelope. Rotate the dough one-quarter turn, and repeat. Use additional flour as needed to prevent the dough from sticking.
  7. Roll out, fold, and turn the dough at least 6 or 7 times. If the dough is starting to seem elastic-y and difficult to roll out, that means it’s time to leave it alone for awhile [see step 3 in my collage above].
  8. When done, wrap the dough in plastic wrap and refrigerate for at least one hour, or overnight.
  1. When you’re ready to make the turnovers: Preheat the oven to 400 degrees F, and line a large baking sheet with parchment paper or a silicone mat.
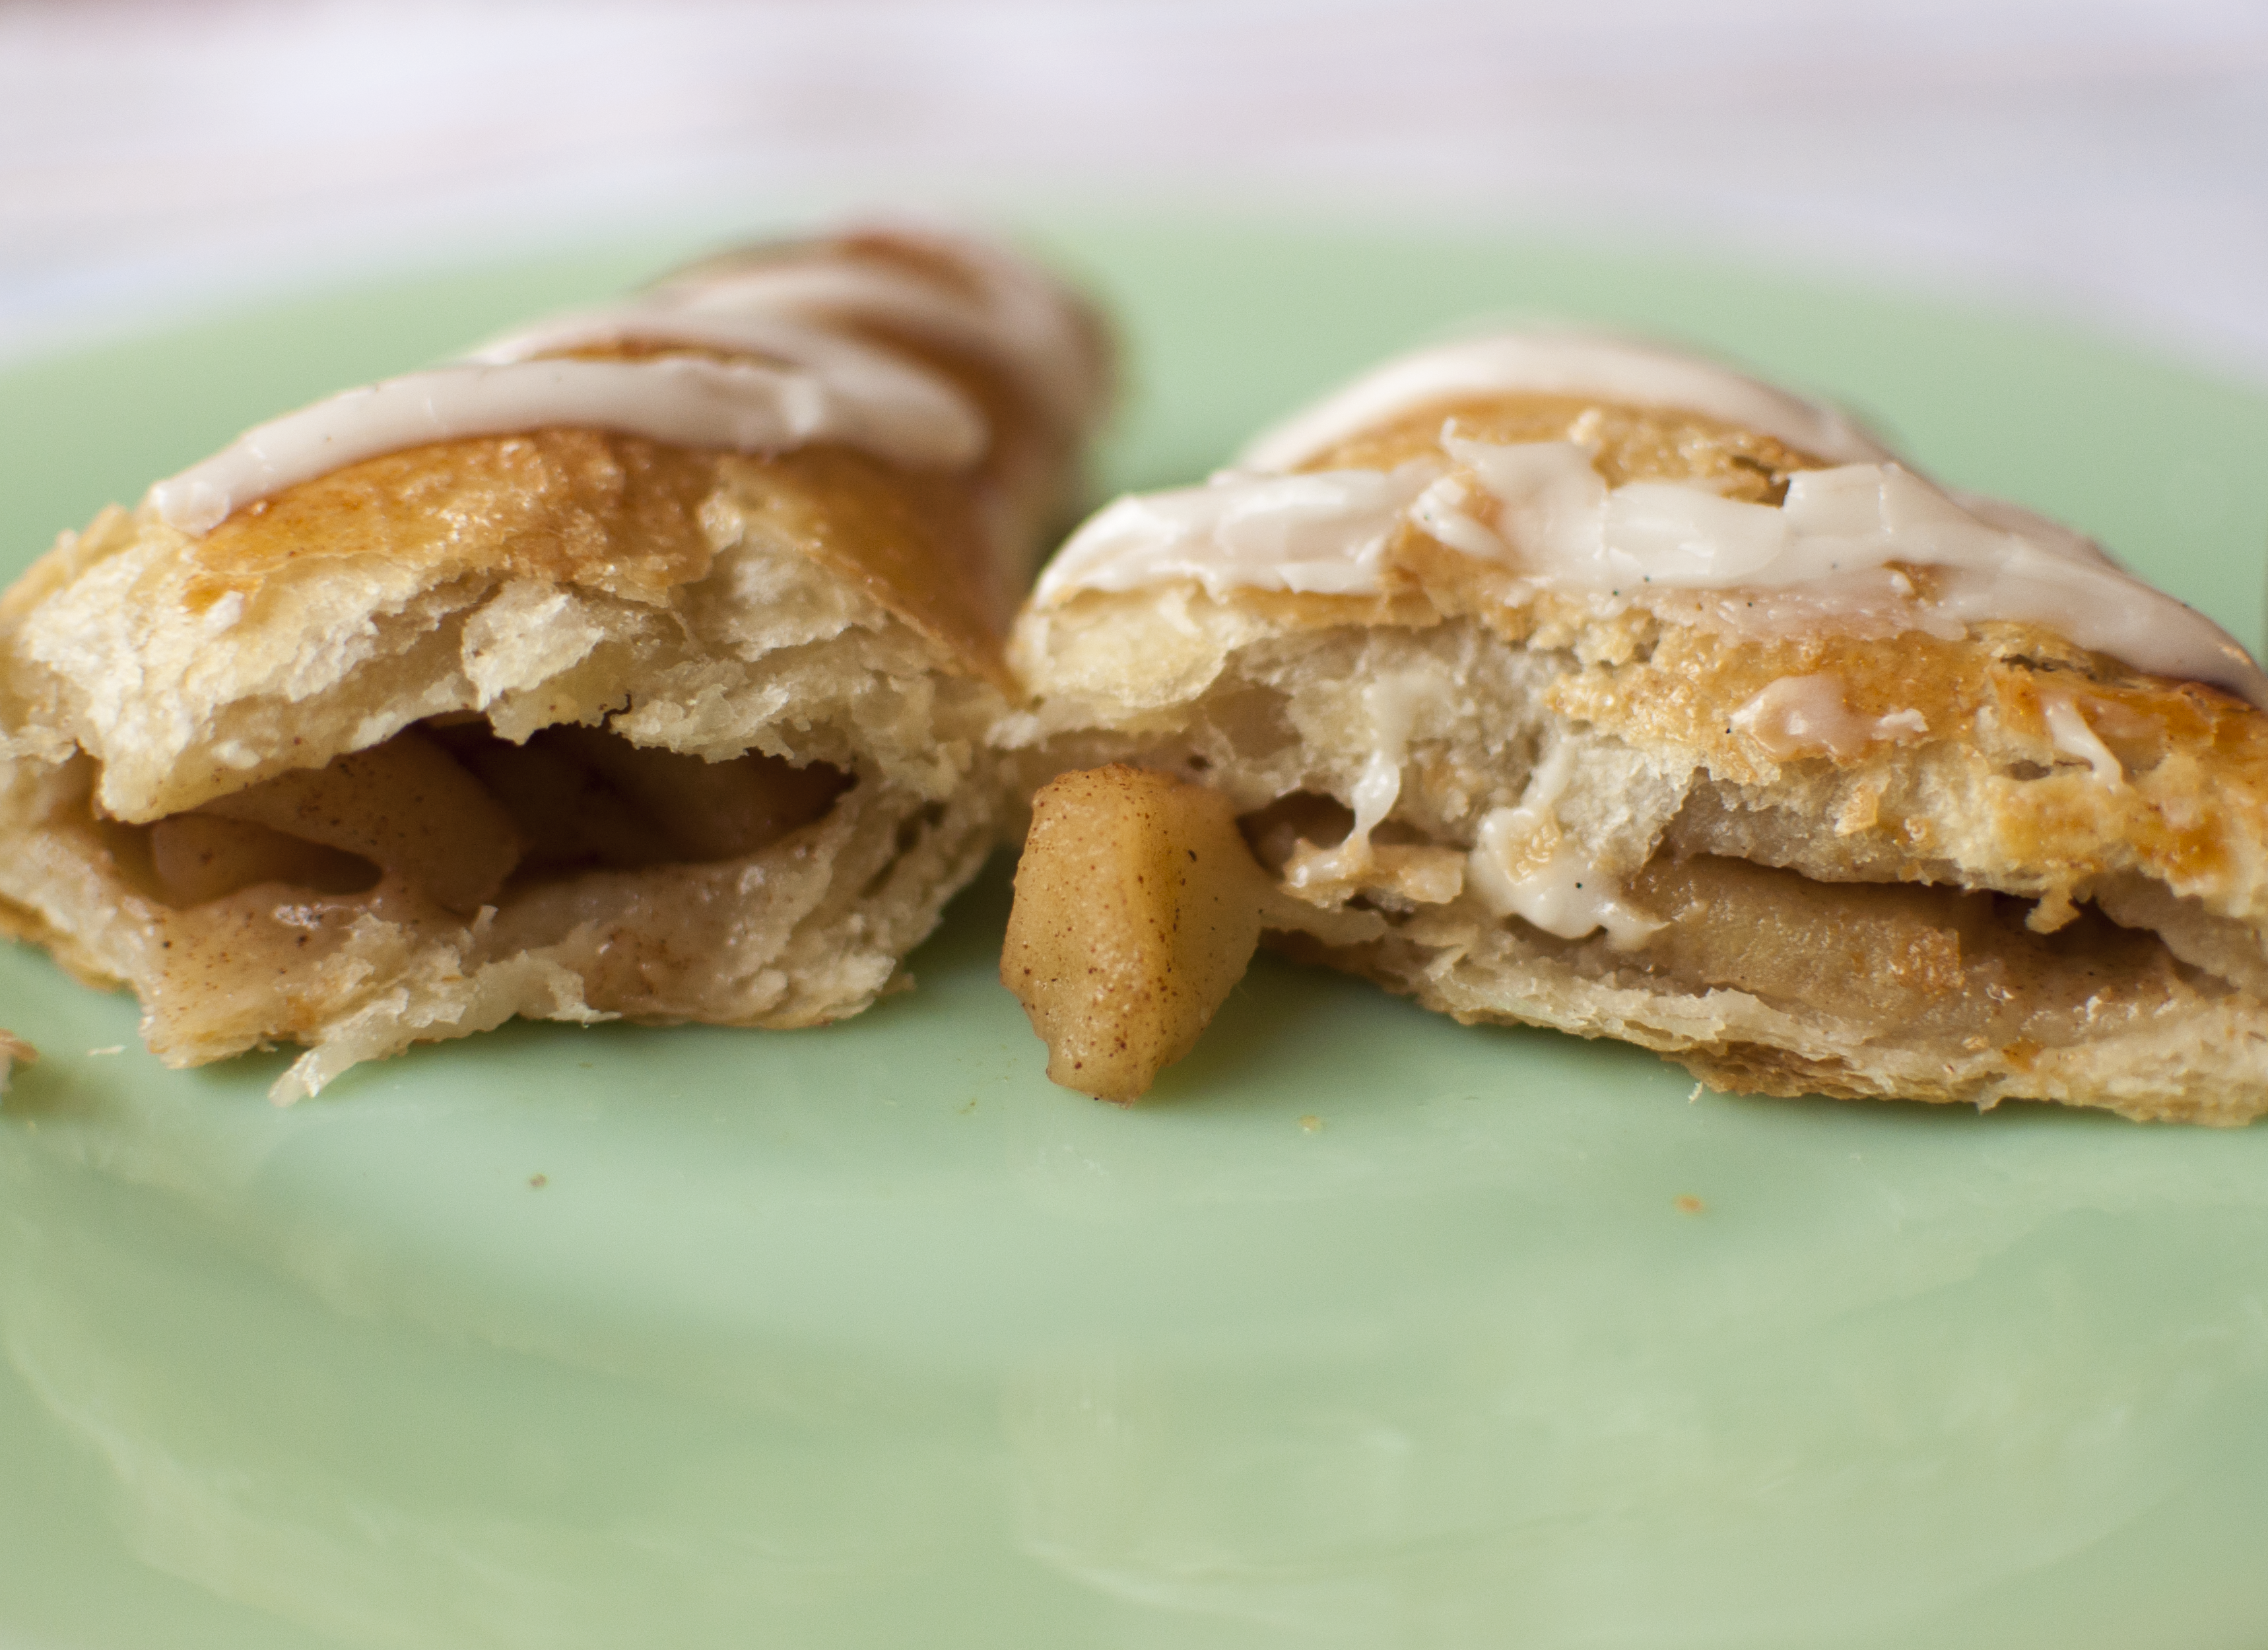
  2. To make the apple filling: First, peel, core, and dice the apples. You should have about two cups of diced apples; a bit less is fine.
  3. Add the apples, cinnamon, nutmeg, lemon juice, sugar, butter and salt to a sauté pan, and cook over medium heat until the apples soften and caramelize, about 7 minutes. Stir frequently.
  4. Remove the apples from the heat and let cool.
  5. Meanwhile, roll out the pre-made pastry dough into a 12-inch square. Use flour as you go to prevent sticking.
  6. Divide the apple mixture into four piles in the corners of the dough, but leave about ¾” of border. Cut the dough into four equal squares. Fold the edges of the dough over each of the apple piles. You will have four triangular pies.
  7. Crimp the edges closed with your fingers and the tines of a fork.
  8. Carefully move the pies to the baking sheet.
  9. Brush each pie generously with the beaten egg yolk. Sprinkle with coarse sugar, if using.
  10. Bake the pies for 20 minutes, or until golden brown and puffy. Serve immediately. {Note: You can add a quick vanilla glaze by mixing some powdered sugar with milk and a little vanilla extract/paste. Stir to get the desired consistency, then spoon over the cooled turnovers. Or you can add it to a little Ziplock bag and pipe stripes over them.}

appleturnover2
[Yaassss.]
+ Recipe from Dessert for Two.

Leave a Comment Filed Under: apple, butter, puff pastry, small batch, small batch baking, turnovers

September 10, 2017

Random Sides // Mise En Place.

A little Sunday food for thought: mise en place.

misenplace_finalcopy
{Art by me; the original bowl icons are from The Noun Project. I colored + designed everything.}

“The system that makes kitchens go is called mise-en-place, or, literally, “put in place.” It’s a French phrase that means to gather and arrange the ingredients and tools needed for cooking.” – Article via NPR.

Mise en place. Have you heard of that phrase? It’s a French one, as all “fancy” [to we English-speaking folk] food-related phrases are.

As aforementioned, it simply means to organize all of your ingredients and tools needed for cooking and baking. I learned of the phrase about a year ago. It’s a simple concept, but one that sticks with me as I continue onward in my baking and cooking adventures. The phrase reminds me to put everything in its place, to read and re-read recipes to ensure correct comprehension of them, and to be fairly organized before I begin. Mise en place saves me a lot of headaches and mistakes, that’s for sure.

Do you practice mise en place? Do you find it useful?

-xoxo.


Leave a Comment Filed Under: art, graphic design, randomness

September 3, 2017

Mini Mixed Berry Pies.

mixedberriespies_cover

First of all, Happy Labor Day, friends! I hope you’re enjoying your day off, while also remembering why we celebrate Labor Day in the first place. I’m currently roaming around my hometown, but we’ll get to that later. For now, let’s talk about mini pies.

closeupminipieI have made these mini pies multiple times, but these photos are actually from Memorial Day weekend {yeahhh, back in May}, but I am sharing them now because we’re embarking upon Labor Day. I think they’re just perfect for any kind of “patriotic” holiday. But really, they’re perfect for pretty much any occasion. I just decided to get all ‘MERICA with them here.

sprankles
{Patriotic sprinkles! I found these at our beloved Target a while back.}

pieniceream
{Melting ice cream + warm pie = one of my favorite combinations on this earth.}

Pie is awesome. And mini pies are slightly more awesome. Why? Because anything miniature is just so darn cute! They’re also quite easy to make: you just roll out your chilled dough, toss a circle of dough in a cupcake tin, add your filling, and then add your top crust. Once you’ve assembled several, throw ’em in the oven to bake! Super cute, super impressive, and much easier than they look [also a heck of a lot less fussy than a whole pie, but you didn’t hear that from me].

// // // // // // // // // // // // // // // // // // // // // // // // // // // // 

// Mini Mixed Berry Pies.

Yield: I doubled the crust recipe (below) to get about six mini pies that will fit in cupcake tins. You may also use the recipe below as is, and make two mini mason jar lid pies [just reduce the amount of filling].

Ingredients:

For the crust:

  • 3/4 cup all-purpose flour, plus extra for rolling
  • 1/4 tsp. coarse salt
  • 3 TBSP. unsalted butter, cold
  • 1/4 tsp. apple cider vinegar
  • 2-3 TBSP. ice-cold water

For the filling:

  • 1 pound mixed berries [You can use frozen if you wish.]
  • 1/4 cup granulated sugar
  • Juice of 1 lemon
  • Cornstarch slurry
For the tops of the pies:
  • 1 large egg, beaten
  • Coarse sugar (e.g. turbinado sugar)

Instructions:
For the crust:

  1. In a small bowl, stir together the flour and salt with a fork. Cube the butter into 12 chunks, and add half of them to the flour mixture.
  2. Stir gently, and then add the remaining butter chunks. Next, using your thumb and index finger [make the “snapping” motion] in order to incorporate the butter chunks into the flour mixture.
  3. Work the butter into the flour for quite a while, making sure it’s evenly incorporated and the dough almost comes together in clumps when you squeeze it in your hands. [The warmth of your hands is bringing the dough together, so if it’s still flour-y, keep working it.]
  4. Finally, add the vinegar and 2 TBSP. of the ice-cold water. Stir with a fork and the dough will easily come together into a mass. You may need a bit more water, depending on the humidity in your area on a given day.
  5. Scoop the dough out onto a piece of plastic wrap, shape it into a disk and store it wrapped in the fridge for 30 minutes, while you make the filling.

For the filling:


1. Make the filling while the dough is chilling: In a small pot on the stove, add your mixed berries, sugar, and lemon juice.
2. Cook on medium low heat for 12-15 minutes until the berries are soft and can be mashed down. The filling will still be too liquidy so make a cornstarch slurry (a few tsp. of cornstarch with some water) and pour it in the pot.
3. Stir the mixture until it thickens up nicely. Set aside for it to cool a bit before assembling your pies.

To assemble the pies:.

  1. Preheat oven to 375 degrees F, and lightly grease 6 muffin cups in your muffin tin.
  2. Once dough is ready, take it out of the fridge and let it warm up for a few minutes.
  3. Roll out one half on the counter top and cut out circles with the largest biscuit cutter you have (or use a large glass; the circle just needs to be larger than the muffin cup).
  4. Place the circles in the muffin cups and crimp down the sides.
  5. Place the cooled filling into the cups, almost until full.
  6. Take the other half of the dough and roll it out. Using a ravioli cutter, cut thin strips of dough to create a lattice pattern on top of the mini pies.
  7. Once you’re done assembling, beat an egg for the egg wash. Using a pastry brush, brush the tops of the pies with the egg wash. Sprinkle coarse sugar on top for extra crunch, if desired.
  8. Bake in oven for 30 minutes or until they’re nice and golden brown on top.
  9. Allow the pies to cool in the muffin pan for 10 minutes before trying to remove from pan.

// Recipe Inspiration + Resources:
+
Mixed berry filling recipe + muffin tin baking method inspired from Table for Two Blog.
+ Pie crust recipe from Dessert for Two.

piecut
{A beautiful mess.}

Leave a Comment Filed Under: blueberries, butter, cherries, mini pies, miniatures, mixed berries, pie, strawberry

August 30, 2017

Chocolate Soufflé with Vanilla Bean Whipped Cream.

I love living in the city. I’ve probably mentioned this in the past, but I’m gonna reiterate it. It’s odd how I became a city girl, because I was actually a small-town kid at heart for the majority of my formative years. You see, I grew up in a small, central Illinois town: one of those towns where all you really had in terms of buildings were churches and bars. The towns were separated by corn fields and soybean fields, and everyone pretty much knew everyone else’s business.

The catalyst for me was when I spent a summer in Philly for an internship during my undergrad days. It was total culture shock for me: a small-town, naïve Midwestern girl, suddenly thrown into a row house, living in West Philly and dealing with internship life at a huge company, plus crazy East Coast traffic? It was pure insanity, and very uncomfortable at times. But it ultimately changed me for the better, and that, my friends, is why I now consider myself a city gal.

I’ve come to appreciate the city living because I adore the culture and history. I love the old brick buildings, the microbreweries, the eclectic, hipster-y mix of it all. I love that I can find Thai food, vegan comfort food, and Afghan food all on one street. The chaos and randomness of the people and places is fascinating to me.

{A few notes on these babies: They will deflate a bit, and the larger sizes will crack. It’s okay. I imagine you could use a water bath to prevent the cracking, but we didn’t. I know it’s not as pretty, but it still tastes awesome, and I like to think the cracks give it character. So don’t fret if you end up with a slightly deflated or cracked souffle!}

But every now and then, there comes a time in which even the most seasoned, accidental city girl needs a break from all the bricks and culture. For times in which I just need a change of scenery, I’ll often take a solo road trip back to Illinois to visit friends and family.

This past weekend, I visited Belle, who is one of my best friends and mentors, an instructor I had during my undergrad days. Of course I always like to plan a baking project when I have my city breaks, so I asked Belle what she’d like for us to bake together.

“Chocolate soufflé,” she said. I’d heard of soufflés before, but I’d never made one. They sound intimidating, but I did my research and figured out that they’re more simple than they seem. So, Belle and I spent Sunday afternoon conquering the chocolate soufflé. It was a fun learning experience for both of us, and of course ending up with a rich, chocolatey dessert certainly doesn’t hurt.

You’ll see in the photos throughout this post that we served our soufflé with homemade whipped cream and fresh raspberries. I liked how the whipped cream – while rich in its own way – helped to cut some of the sweetness of the chocolate soufflé. Plus, fresh raspberries just pair so well with chocolate, so that was pretty much a given.

{Note: I didn’t really change up The Kitchn’s instructions, listed below. I think they do a good job of spelling it all out for you. Mostly, I just wanted to share this experience and add a few of my notes mixed in. Enjoy!}

// // // // // // // // // // // // // // // // // // // // // // // // // // // // // // // // // // // //

Chocolate Soufflé with Vanilla Bean Whipped Cream.

Yield: Six individual soufflés in ramekins, or one large 1.5qt-sized dish.

For the soufflé:

Ingredients:
– 2 TBSP. unsalted butter, plus extra to grease the soufflé dishes
– 8 oz. bittersweet chocolate, finely chopped [I used Ghirardelli 60% cacao, and I think it worked well]
– 3 large eggs yolks
– 1/2 cup granulated sugar, divided, plus extra to coat the soufflé dishes
– 6 large egg whites
– 1 tsp. vanilla extract
– 1/4 tsp. coarse salt

Instructions:

  1. First, heat the oven to 375°F. You want your oven to be fully heated up and ready when it’s time to put the soufflé in.
  2. Prepare the soufflé dishes: Rub the insides of the ramekins or soufflé dish with butter. Coat with sugar by sprinkling a tablespoon of sugar in the bottom of each ramekin (or a scoop of sugar in the larger soufflé dish), and then tilting and tapping the dish to work the sugar into the corners and up the sides of the dish.
  3. Melt the chocolate: Combine the chocolate and 2 tablespoons of butter in a heatproof bowl. Set the bowl over a small saucepan of barely simmering water; make sure the bottom of the bowl doesn’t touch the surface of the water. (Alternatively, use a double-boiler.) Melt the chocolate, stirring occasionally, until completely smooth.
  4. Cool the chocolate slightly: Remove the chocolate from heat and stir in the vanilla and salt. Let the chocolate cool until still very loose, but just slightly warm to the touch [you don’t want scrambled eggs, so make sure it’s cooled before you add the yolks].
  5. Whisk together the yolks and 1/4 cup of sugar: Transfer the yolks to a mixing bowl. Measure out 1/4 cup of sugar and sprinkle over the yolks. Whisking by hand or in a stand mixer with a whisk attachment, whisk the yolks and sugar together. They will start off bright yellow and will gradually lighten. The eggs and sugar are ready when light yellow in color, and the mixture forms ribbons that hold for a few seconds on the surface.
  6. Combine the chocolate and the yolks: Pour the yolks over the chocolate. Use a spatula to gently fold the chocolate and the yolks together until completely combined.
  7. Beat the egg whites until frothy: Clean your mixing bowl thoroughly and make sure it is dry and free of any grease. Add the egg whites. Beat at gradually increasing speed until the whites are quite frothy and opaque.
  8. Add the sugar to the whites and beat until stiff peaks form: With the mixer running at medium speed, gradually add the remaining 1/4 cup of sugar to the egg whites. Once all the sugar has been added, increase the speed to high and beat the whites until they form stiff peaks.
  9. Lighten the chocolate base: Scoop about 1/4 of the beaten egg whites into the bowl with the chocolate base. Stir them in until no visible egg whites remain. This lightens the base and makes it easier to add the rest of the egg whites without deflating them too much.
  10. Gently fold the egg whites into the base in two batches: Scoop half of the rest of the egg whites on top of the chocolate base. Using your spatula, cut through the center of the mixture, scoop the spatula underneath, then gently lift and flip the mixture over onto itself; this is called folding the egg whites into the base (it helps prevent deflating them too much). Give the bowl a quarter turn and repeat the folding motion. Once this batch is nearly incorporated, add the remaining whites. Continue until you see no more visible egg whites in the base.
  11. Divide the soufflé batter between the prepared ramekins.
  12. Bake until the soufflés are puffed and the tops look dry: Bake small soufflés for 18 to 20 minutes, or one large soufflé for 35 to 40 minutes [it took about 32 minutes for ours to finish baking].
  13. Serve immediately; it is best eaten right away.

For the whipped cream:
Ingredients:
– 1 cup chilled heavy whipping cream
– 3 TBSP. powdered sugar, or to taste
– 1 tsp. vanilla bean paste

Instructions: Add all ingredients to the bowl of a stand mixer, fitted with the whisk attachment, and mix until medium peaks form. Store in the fridge until ready to use [homemade whipped cream is also best eaten the day it’s made].

+ Recipe resources: The chocolate soufflé recipe is from The Kitchn, and the whipped cream recipe is adapted from KitchenAid.

Leave a Comment Filed Under: chocolate, souffle, vanilla bean, whipped cream

August 16, 2017

On Coming to Terms with a New Diagnosis: Part I.

It was a quiet Friday afternoon in mid-July.

I sat there in the silver, flowery chair, fidgeting slightly as I spilled my guts to my new psychiatric nurse practitioner. I explained all my history with feeling super depressed most of the time, going on random “creative” binges, having issues keeping up a healthy routine in life, and that most of the antidepressants (at least 15 at this point; I’d lost track) that I’d experienced didn’t work for me.

{Consider this. <3}

After an hour of sharing my story, I received my new diagnosis: “Bipolar two disorder.”

Wait, what?

I’ve literally spent the last 6+ years [really, 12+ years; all retrospectively, of course] assuming that I’m “just really, really depressed, and it’ll probably always be that way.” And that all the antidepressant medications simply don’t work for me. And that I’d probably just never be “happy” or feel an ounce of true “normalcy” ever again.

But bipolar disorder? That was never on my radar until the nurse practitioner mentioned it.

Suddenly, it was as if the clouds parted and everything made sense: I have bipolar II disorder. {Not to be confused with bipolar I. They are not the same disorder.}

It’s no wonder I spent years of my life going back and forth between being really, extremely depressed, and then sometimes hypomanic [Hypomania refers to “mild” mania; as in, it’s not full-blown mania]. It’s no wonder I could never find a medication that truly worked for me. It is no wonder I have struggled with keeping up with a healthy routine; that my sleep schedule is absolutely whack, and that nothing ever really made sense.

As I drove to Target to pick up my new prescription for 300mg of lithium, I felt a mix of emotions: relief, clarity, and anxiety for what was to come. It was bizarre, yet it made more sense than anything regarding my battles with mental health issues thus far.

I parked my car in the clusterfuck of the Brentwood Promenade parking lot. As soon as I put my car into park, Nirvana’s “Lithium” began to play on the alt-rock station. “Well that’s kind of hilariously ironic,” I thought to myself.

~*~*~*~*~*~*~*~*~

It’s now been about a month since my new diagnosis. I’m up to 600mg of lithium at this point, and I’m still regularly pursuing cognitive behavioral therapy, plus attending followup sessions with my nurse practitioner to manage my medications. Finally, I’m starting to feel much better. I’ve written about my issues with the depression part of bipolar II (“BP II” for short), though it never used to have a label. {Seriously, just search for “depression” on this blog, and you’ll find a slew of my ramblings.}

I wanted to write a bit about my new diagnosis, though. I have had quite a bit of time to think about it, to adjust, and to come to terms with it. All of these things will take more time to process, of course, but I find it important to journal my experiences as soon as I am able.

{I often liken my brain to a bowl of one pound of rainbow jimmies [which get EVERYWHERE when you use them, and are a bit static-y]: a little crazy, very colorful, kind of disorderly, might need some help being wrangled around, but ultimately: beautiful, awesome, and worth-it.}
In the near future, I want to write more about my experiences and symptoms relating to BP II in the hopes that it will help others. The primary issue with BP II is that it is very tricky to diagnose, and often gets overlooked, not taken seriously, or simply misdiagnosed {all of which were the case for me}.

I’m so, so SO fortunate and grateful to have a great psychologist as well as a psychiatric nurse practitioner who finally take me seriously. I am so lucky to be able to find the right medication. I hope things can improve from here, and that I can finally start to live and even thrive in my life. {Right now I’m struggling with the bitter feeling that stems from viewing all this time of misdiagnosis as “wasted time,” so it will be interesting to see how I manage to get past that!}

Anyway, please stay tuned for more posts on BP II, as I continue to get better and learn more about this mysterious illness.

{Final side note: If you have any questions or concerns regarding BP II, depression/anxiety, etc., then please don’t hesitate to reach out. I’m on a quest to end the stigmas associated with mental health issues, and I am absolutely not afraid to be an open book. It’s therapeutic, and I honestly don’t give a rat’s ass about judge-y folk.}

xoxo.

{An ethereal snapshot of me holding lemon bars during golden hour in a St. Louis park. I just feel like this picture captures my overall state of being these days. Photo credit: Jordyn Dolan Photography.}


2 Comments Filed Under: bipolar II, depression, personal, random sides

August 15, 2017

{Easy} Small-Batch Macarons.

Anyone who’s a baker can confirm that macarons are one of the trickier beasts of baking. Well, baking can be a bit of a tricky beast in general – which is precisely why I love it – and probably why many people hate it.

But macarons. Oh man. They’re just on another level of sorcery. Macarons are finicky little buggers to begin with, and the errors involved with making them are often difficult to troubleshoot.

{This photo captures the detail of the “feet” that properly made macarons should form. Notice the crackled part that surrounds the bottom of each cookie? That’s the “foot.” A slather of Nutella and sprinkles between the feet of each cookie make for a nice sammich here.}

I have attempted to make macarons at least twice in the past several years, but they were riddled with problems: too chewy, the tops cracked, the “feet” didn’t setup as they were supposed to; I did a horrible job piping them into a nice circle, etc. Honestly, I got quickly frustrated, and gave up. For a solid year, I tucked my seemingly grandiose macaron fantasies into the [very crowded] back burner of my brain.

{Here’s Helen rocking the hand modeling job with our vanilla buttercream-filled macs.}

Finally, one day about six months ago, I stumbled upon a small-batch macaron recipe from Dessert for Two. It occurred to me that it might be a good idea to try making a smaller batch of them; surely that had to reduce some of the intimidation, right?

Turns out that I was indeed right: making a smaller quantity was more approachable, and of course, Christina had many great tips to ensure success. I attempted to make them once by myself, and much to my surprise, I succeeded. Then my friend Helen asked if I’d show her how to make them again, so we had another friend baking date. The photos in this post are the ones that I captured from both my solo macaron baking session + the macaron session with Helen.

{I just love this jadeite plate; it pairs so nicely with my treats.}

If you’re ready to give macarons a go, might I suggest making them in a small batch? It might make them easier and more approachable for you. Let me know if you try them out; it’s a great bucket list item to cross off your baking to-do list; trust me! 🙂

// // // // // // // // // // // // // // // // // // // // // // // // // // // // // // // // // // // // //

{Easy} Small-Batch Macarons.

Ingredients:

For the macarons:

  • 2 aged egg whites, at room temperature*
  • 68 grams almond flour*
  • 153 grams powdered sugar
  • 2 tablespoons meringue powder*
  • 3 drops vanilla extract
For the filling: We used a mix of berry preserves and homemade vanilla buttercream as our filling. Feel free to use any kind of jam/preserves, buttercream, a ganache, Nutella; whatever your heart desires!

Instructions:

  1. First, let the egg whites come to room temperature in a medium bowl. Using a food scale, measure out your dry ingredients in separate bowls.
  2. Line a baking sheet with parchment paper (or a silicone mat, if that’s your thing). Make sure the paper fits into the pan perfectly: any buckled paper around the edges will make the cookies spread unevenly and slide.
  3. Meanwhile, sift together the almond flour and powdered sugar into a medium bowl {Sifting them is NOT an option!}.
  4. Begin to beat the egg whites on medium speed using a hand-mixer until foamy, about 10 seconds. Then, start slowly adding the meringue powder while constantly beating.
  5. Beat the egg whites and meringue powder until soft peaks form, about 1-2 minutes. This will depend on your mixer speed, but be careful not to over-mix. The peaks are soft when you lift the beaters and the egg whites flop over.
  6. Once the egg whites have soft peaks, turn off the mixer.
  7. Add 1/3 of the almond-sugar mixture and begin to gently fold it in using a small spatula. Take your time: proper folding technique is carefully folding around the sides and cutting through the middle occasionally. The idea is to not stir too hard and deflate the air you just whipped into the egg whites.
  8. Repeat with the remaining almond-sugar mixture two more times, until completely incorporated.
  9. Scrape the batter into a piping bag with a 1/2″ round tip (or use a plastic bag with the corner snipped off). The batter will be thick.
  10. Pipe the batter into 1″ little mounds (about the size of a large Hershey’s kiss), and let sit. While they sit, they should flatten out. Leave 2″ between each cookie for air circulation.
  11. Let the cookies rest on the baking pan for at least 30 minutes. Test to see if they are tacky–if you touch the cookies gently and the batter sticks to your finger, they’re not ready. They should be dry to the touch. {Note that humidity plays a big factor in how long it takes for them to dry out. So it may take longer on some days than others.}
  12. Meanwhile, preheat the oven to 300 degrees F [or 290 if your oven runs hotter; many gas ovens do]. Bake the macarons for 13 minutes, until their little feet have risen and the tops are dry.
  13. Remove from the oven and let cool near or on top of the oven [drastic temperature changes can cause cracks].
  14. Once cool, pop the cookies off the sheet, spread with your desired filling, and gently sandwich the best-matching ones together.

*Notes:

  • Aged Egg Whites: To age your egg whites: separate the whites from the yolks [be sure there are absolutely no yolks in them!], cover them and refrigerate for at least one week. Allow them to come to room temperature before using. {Additional note: It is crucial that you give the egg whites time to “age” in the fridge. Fresh egg whites will not work.
  • Almond Flour: I use the Bob’s Red Mill brand, which can be found with the specialty flours in most grocery stores, or via Amazon. It works well, but do not forget the sifting step. It’s essential for properly made macarons.
  • Meringue Powder: I prefer the Ateco brand (can be found on Amazon), but you can also use the Wilton brand (can be found on Amazon and/or craft stores, e.g. Michael’s).

+ Recipe Source: Macaron recipe via Dessert for Two.

Leave a Comment Filed Under: almond flour, cookies, macarons, small batch, small batch baking

April 10, 2017

Tres Leches Cake: Take Two.

Baking has always been a mostly solitary activity for me. Usually I’m content with this; I’m a very introverted person at heart, after all. I just love being in that therapeutic zone in my own mind when I’m working on a baking project. {But I also have a tendency to be in my own head a bit too much. Oops.}


So I think it goes without saying that it’s not often that I take the opportunity to bake with other people. But every now and again, someone asks to bake with me; in part as a friend date, but also as a baking lesson for them. Making this tres leches cake turned out to be the perfect friend date/baking lesson with one of my newer [but really great!] friends, Helen.

We spent a Saturday morning a while back back dressed up like 1950s housewives, petting her cute little dog, Harry, and making delicious cake. Just ’cause we can. The cake was a very late birthday present for one of our other good friends, Jimmy. You see, tres leches cake is Jimmy’s favorite cake of all time, and I actually made him a tres leches cake using a different recipe a while back. While that recipe certainly wasn’t bad by any means, I had been itching to try a new recipe this time around. I found that I actually prefer this recipe over the old one; this cake was nothing short of amazing.

trust the process collage
{From top to bottom: 1. whipped egg whites; 2. Helen uses the whisk attachment on the mixer; 3. A shot of my half sleeve as I’m using the mixer; 4. Lightly sweetened homemade whipped cream is the best!}

{Side Note: Unfortunately, I didn’t receive my 64 gig SD card for my digital SLR camera in time for this project, so I wasn’t able to take fancy pictures. So you’ll have to deal with semi-crappy phone photos of this cake for now.}

{From top to bottom, left to right: 1) Helen brought her doggie, Harry over to visit for our baking shenanigans; 2) I like to draw my “menu” on the chalkboard in my kitchen; 3) Helen snapped a photo of me pouring the three milks over the cake; and 4) We enable bad doggie behavior by letting Harry sniff some of the cake; don’t worry, I got him some pig ears to make up for the teasing!}

If you’re not familiar with tres leches cake, you are missing out. But don’t worry: I’m here to fill you in on tres leches cake and its awesomeness. Tres leches translates to “three milks” in Spanish. The cake itself is actually a sponge cake, so it soaks up the three milks; the end result is a deliciously moist, rich cake. In this case, the three milks used are evaporated milk, sweetened condensed milk, and heavy cream. We also added some pure vanilla extract and bourbon to the milks for good measure. Then you just make a simple homemade whipped cream topping, and serve it with maraschino cherries after it’s had time to chill in the fridge for a while.

{Our Sunday “Tres Leches Cake and Macaron” party was a smashing success!}

{Jimmy and Helen dig in to their cake slices!}

The recipe itself comes off as slightly intimidating [e.g. separating eggs, whipping egg whites, etc.], but it’s truly not that complicated. It’s mostly a matter of reading the recipe multiple times prior to making it, and ensuring that you understand all the directions. If you’ve got a free Saturday afternoon and you’re looking for a special cake to make for someone, then I’d highly recommend making a tres leches cake. It’s a rare treat for me to have such a cake, but they’re totally worth it. Enjoy. {PS: It also helps when you have great friends to make and share the cake with, plus a cute doggie to “supervise” the process!}

{I enjoy the last few bites of my cake.}

// // // // // // // // // // // // // // // // // // // // // // // // // // // // // // // // // // // // // // // // // // // // // // //

Tres Leches Cake.


Yield: One 13×9″ pan; about 12 slices.

Ingredients:

For the Cake:
– 1½ cups all-purpose flour
– 2 teaspoons baking powder
– ½ teaspoon salt
– 6 large eggs, separated
– ½ teaspoon cream of tartar
– 1½ cups granulated sugar
– ⅓ cup cold water
– 2 teaspoons pure vanilla extract
– 1 teaspoon pure almond extract

For the Milks:
– 1 cup heavy cream
– 1 can (14 ounces) sweetened condensed milk
– 1 small can (5 ounces) evaporated milk
– 1 tablespoon rum or brandy {Optional; I used some bourbon because I was out of rum.}
– 2 teaspoons pure vanilla extract
For the Whipped Frosting:
– 2 cups cold heavy whipping cream
– ½ cup powdered sugar
– 1 teaspoon pure vanilla extract {I used vanilla bean paste here.}
– Sprinkles and maraschino cherries for garnish


Instructions:
1. Preheat oven to 350°F. Line a baking 9×13″ baking pan with parchment paper and/or grease lightly with nonstick cooking spray and set aside.
2. In a medium bowl, combine the dry ingredients: flour, baking powder and salt, set aside.
3. In the bowl of a stand mixer fitted with a whisk attachment [or an electric hand mixer in a large bowl], whip together the egg whites, along with the cream of tartar until soft peaks form, about 5 to 7 minutes. Transfer to a medium bowl and set aside.
4. In the rinsed bowl of a stand mixer fitted with a paddle attachment, beat the egg yolks and granulated sugar until thick and pale. Stir in the vanilla extract, almond extract and water, until smooth. Add the flour mixture and stir until just combined.
5. Fold in the egg whites, a one third at a time, making sure to not over mix.
6. Pour batter into prepared baking pan and bake for about 25 to 30 minutes, or until a toothpick inserted in the middle comes out clean. Remove from the oven and allow to cool completely in the pan, but on a cooling rack.
7. Whisk together the tres leches ingredients, in a medium bowl. Using a wooden skewer or toothpick, poke holes all throughout the cooled cake. This will allow for the milk mixture to seep in. Pour the milk, evenly, over the cake. Cover with plastic wrap and allow to chill in the fridge for about 3 hours, or overnight. {I let mine chill overnight, and it is definitely worth the wait!}
8. Make the whipped cream topping by beating the heavy whipping cream along with the sugar and vanilla extract, until soft peaks form. Spread the whipped cream over the chilled cake.
Cover and refrigerate overnight.
9. Just before ready to serve, decorate with sprinkles and maraschino cherries! Enjoy chilled!


+ Recipe via The Candid Appetite [Originally found on Joy the Baker’s blog, but I think the recipe is by TCA].

{I had a slice for my post-lunch snack the following day. It was delicious.}

Leave a Comment Filed Under: birthday, cake, cake cake cake, cherries, tres leches, vanilla

January 1, 2017

{The Final RBE}: Homemade Toasted Raviolis.

I realize that I’ve been more neglectful than usual toward my poor blog. But if I’m being honest, the past ~6 months have really thrown me for a loop. I haven’t felt inspired to write here at all, and I have been crazy busy with all of life’s wonderful ups and downs. Sometimes, blog neglect just happens.

Anyway, luckily I am starting to feel a bit better mentally {although I am fighting off a nasty cold right now, so I don’t feel the best physically!}, and I’m feeling a bit more inspired to write about my foodie adventures these days.

All that to say, I feel that now is as good of a time as any to talk about homemade toasted raviolis, aka toasted ravs, aka t-ravs. {Sorry ’boutcha New Years diet. #yolo}

toastedravs_cover

Back in June 2016, my [now former] roommate and I were nosing around in a used bookstore on South Grand Avenue in St. Louis. Our two year roommate-relationship [roomieship? I don’t know, haha] was coming to a close, and we were both trying to decide what our final Roommate Baking Endeavor {RBE} project should be. We’ve always had a lot of fun devising a baking/cooking project and then working on creating something together. So we knew that our final RBE as roommates had to be epic.

As we were pacing around in the basement of this bookstore, we both were hit with inspiration: It should be St. Louis-themed! Except neither one of us love gooey butter cake [gasp!], so we were then trying to come up with something else.

Then it hit me: homemade toasted raviolis!

cooperandwallravs
{Cooper couldn’t have picked a better day to wear his STL-themed t-shirt! Thanks for being my faithful hand model, yo.}

toastedravs

In case you weren’t aware, toasted raviolis are a total staple in St. Louis cuisine. And since we enjoyed two years in the city as roomies together, they couldn’t be more perfect for our final RBE. It was also the perfect opportunity for us to try out Dani’s KitchenAid mixer pasta rolling attachment. Homemade t-ravs are a bit of ahem… well, a labor of love. But if you have some spare time, and aren’t afraid of frying oil, then you should try these out. It was a fun afternoon project, although there was definitely a learning curve with making these bad boys.

toastedravsscale

// // // // // // // // // // // // // // // // // // // // // // // // // // // // // // // // // // // // // // //  // //

Homemade Toasted Raviolis.

Ingredients:
For the Ravioli Dough:
– 1 cup semolina flour
– 1 cup all-purpose flour, plus more for rolling dough
– Pinch kosher salt
– 2 large eggs
– 1 teaspoon olive or vegetable oil

For the Filling:
– 1 pound shredded provolone or mozzarella cheese
– 1/2 pound ground beef, cooked and drained of excess oil
– 1 tablespoon minced garlic
– 1 tablespoon minced fresh parsley
– Kosher salt and freshly ground pepper

For the Ravioli Assembly:
– 4 eggs, 1 lightly beaten for egg wash
– 1 cup heavy cream
– 2 cups Italian breadcrumbs
– 1/8 cup grated Parmesan
– Canola oil, for frying

+ Instructions {I didn’t feel like reinventing the wheel with the instructions here. So please keep in mind that this is copied from the Food Network’s website. Just giving credit where it’s due!}:
1. For the dough: Sift the flours and a pinch of salt into a bowl. Whisk together the eggs, oil, and 2 tablespoons water in a separate bowl. Pour the flour mixture onto a clean dry work surface and form a small well in the center. Pour half of the egg mixture into the well and, using a fork, begin to incorporate the flour into the egg mixture. Once absorbed, incorporate the remaining egg mixture and knead by hand until all of the liquid is absorbed, 5 to 6 minutes, flouring your work surface as needed to ensure the dough doesn’t stick. Roll the dough into a ball, cover with plastic wrap, and let rest in the refrigerator for 1 hour.

2. For the filling: Mix together all of the ingredients until fully incorporated in a bowl. Chill in the refrigerator for at least 20 minutes, or up to 1 hour.

3. To assemble: Divide the rested dough into 2 equal-size pieces and roll out on a floured work surface to a thickness of 1/8-inch. On 1 dough sheet, distribute tablespoon-sized portions of the filling, at least 2 inches apart. Brush the edges of the dough with the egg wash. Carefully lay the second sheet of dough on top and press the edges shut with your fingertips. Use a round 1 1/2-inch ravioli cutter to portion out ravioli pieces, pinching the edges shut to ensure no air is trapped inside.

4. In a large heavy-bottomed saucepan, pour enough oil to fill the pan about a third of the way. Heat over medium heat until a deep-frying thermometer inserted in the oil reaches 350 degrees F.

5. Whisk the remaining 3 eggs and cream in a shallow bowl. Place the breadcrumbs and Parmesan into another shallow bowl and stir to combine. Dredge the ravioli in the egg mixture, followed by the breadcrumb mixture. Working in batches, carefully drop the ravioli into the saucepan and fry until golden brown, 2 to 3 minutes, making sure that the oil comes back up to temperature in between batches. Place directly onto a cooling rack lined with aluminum foil to drain any excess oil.

6. Serve with warm tomato sauce and freshly grated Parmesan.

// Our RBE Notes:
+ There is a bit of a learning curve with rolling out the pasta dough. It’s kind of a pain, but be patient and keep at it. Pasta is relatively simple, but since we were new to making it, we weren’t sure what the consistency was supposed to be like.
+ I personally found the filling to be a bit bland. Next time I’d add some kosher salt or perhaps garlic salt.
+ Feel free to experiment with your fillings; all cheese would be tasty, and I’m betting that Italian sausage would be delicious!

+ Toasted raviolis taste the best on the day they’re made. But if you want to reheat leftovers, I’d advise reheating them in your oven on a lower temperature to avoid sogginess.

// Recipe Sources:
+ Ravioli dough, filling, and coating recipe from The Food Network.
+ Homemade marinara sauce recipe from The NY Times.

Leave a Comment Filed Under: pasta, RBE, st. louis, STL

July 8, 2016

Just a Friendly Reminder.

Just a friendly reminder. <3 More blog posts coming soon. Peace, love, and baked goods to all.

love_mlk

Leave a Comment Filed Under: inspiration, life

Next Page »

Hello, World!

Welcome! I'm Darcie, and I am obsessed with baking.
Darcie
Learn more about me here.

// // // // // // // // // // // // // // // // // // // // // // // //

Socialize.

I <3 Hipstagram.
Instagram Icon
I'm slightly addicted to Pinterest.
Pinterest Icon
Find me on Facebook.
Facebook Icon
Tweet, tweet.
Twitter Icon

Search.

Subscribe.

Enter your email address to subscribe to this blog and receive notifications of new posts by email.

Instagram Feed.

Load More...Follow on Instagram

// // // // // // // // // // // // // // // // // // // // // // // // // // // // // // // // // // // // // // // // // // // // // // // // // // // // // // // // // // // // // // // // // // // // // //
Copyright © 2015 Darcie Bakes. All Rights Reserved.

Website designed by Darcie C., using the Beautiful Pro Theme.

Proudly powered by the Genesis Framework.